Create New Hosting
In our control panel, you can manage multiple customers under your account, create one or more domains per customer, and then assign these either to a new hosting (as the main domain) or to an existing hosting (as a so called «Addon Domain»).
When setting up a new hosting, always proceed as follows:
- Create Customer – Should the new hosting appear under its own customer and be billed separately? Then create a new customer on the Dashboard.
- Set Up Domain – For a hosting, you usually need a domain. You must first set this up under «Domains» in all three cases: Domain Registration of a new domain, Domain Transfer of an existing one, or simply a domain you manage yourself via an external registrar.
- Create Hosting – You can now create a new limeBASIC/limePRO hosting, and the newly set up domain will be available for selection.
IMPORTANT
To create a hosting, you must always set up a domain first. It doesn’t matter whether you want to register/transfer it through us or manage it yourself elsewhere - it must always be added first under Customer > «Domains».
Proceed step by step as follows:
1. Create Customer
Create a new customer on the Dashboard if the domain and hosting should be billed separately. Otherwise, you can keep your existing customer and add more domains/hostings under it. Just remember that the domain for a hosting must always belong to the same customer.
Click to create a new customer:
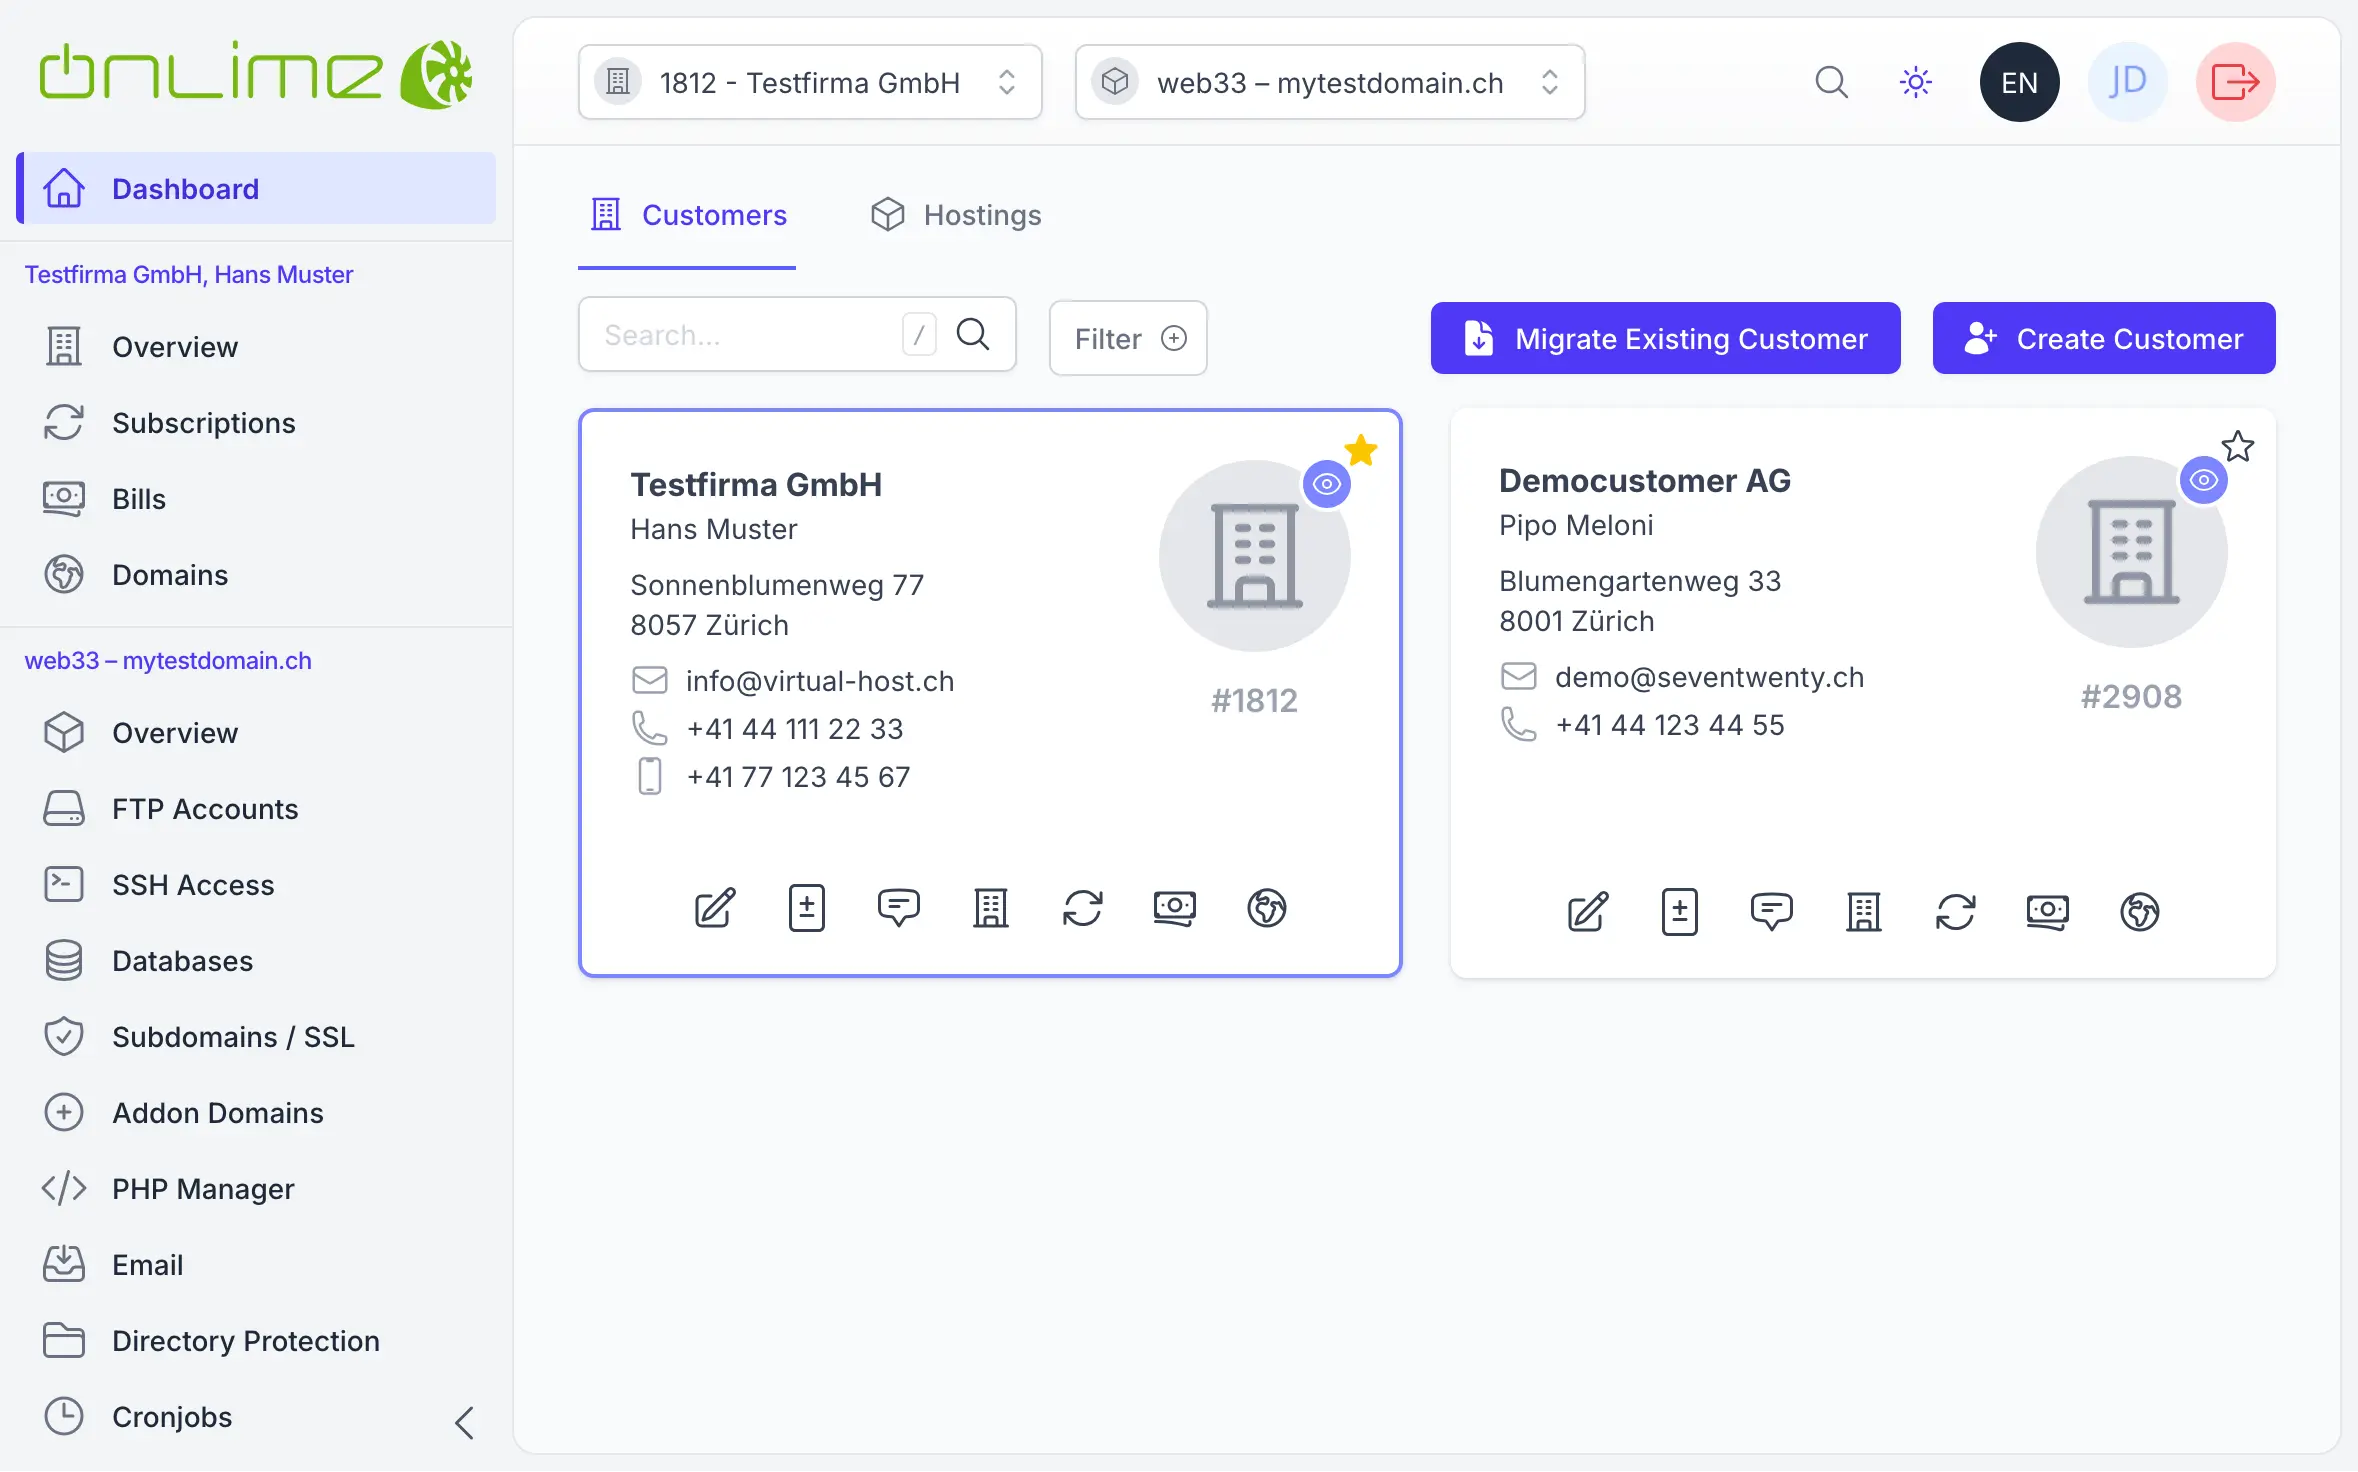
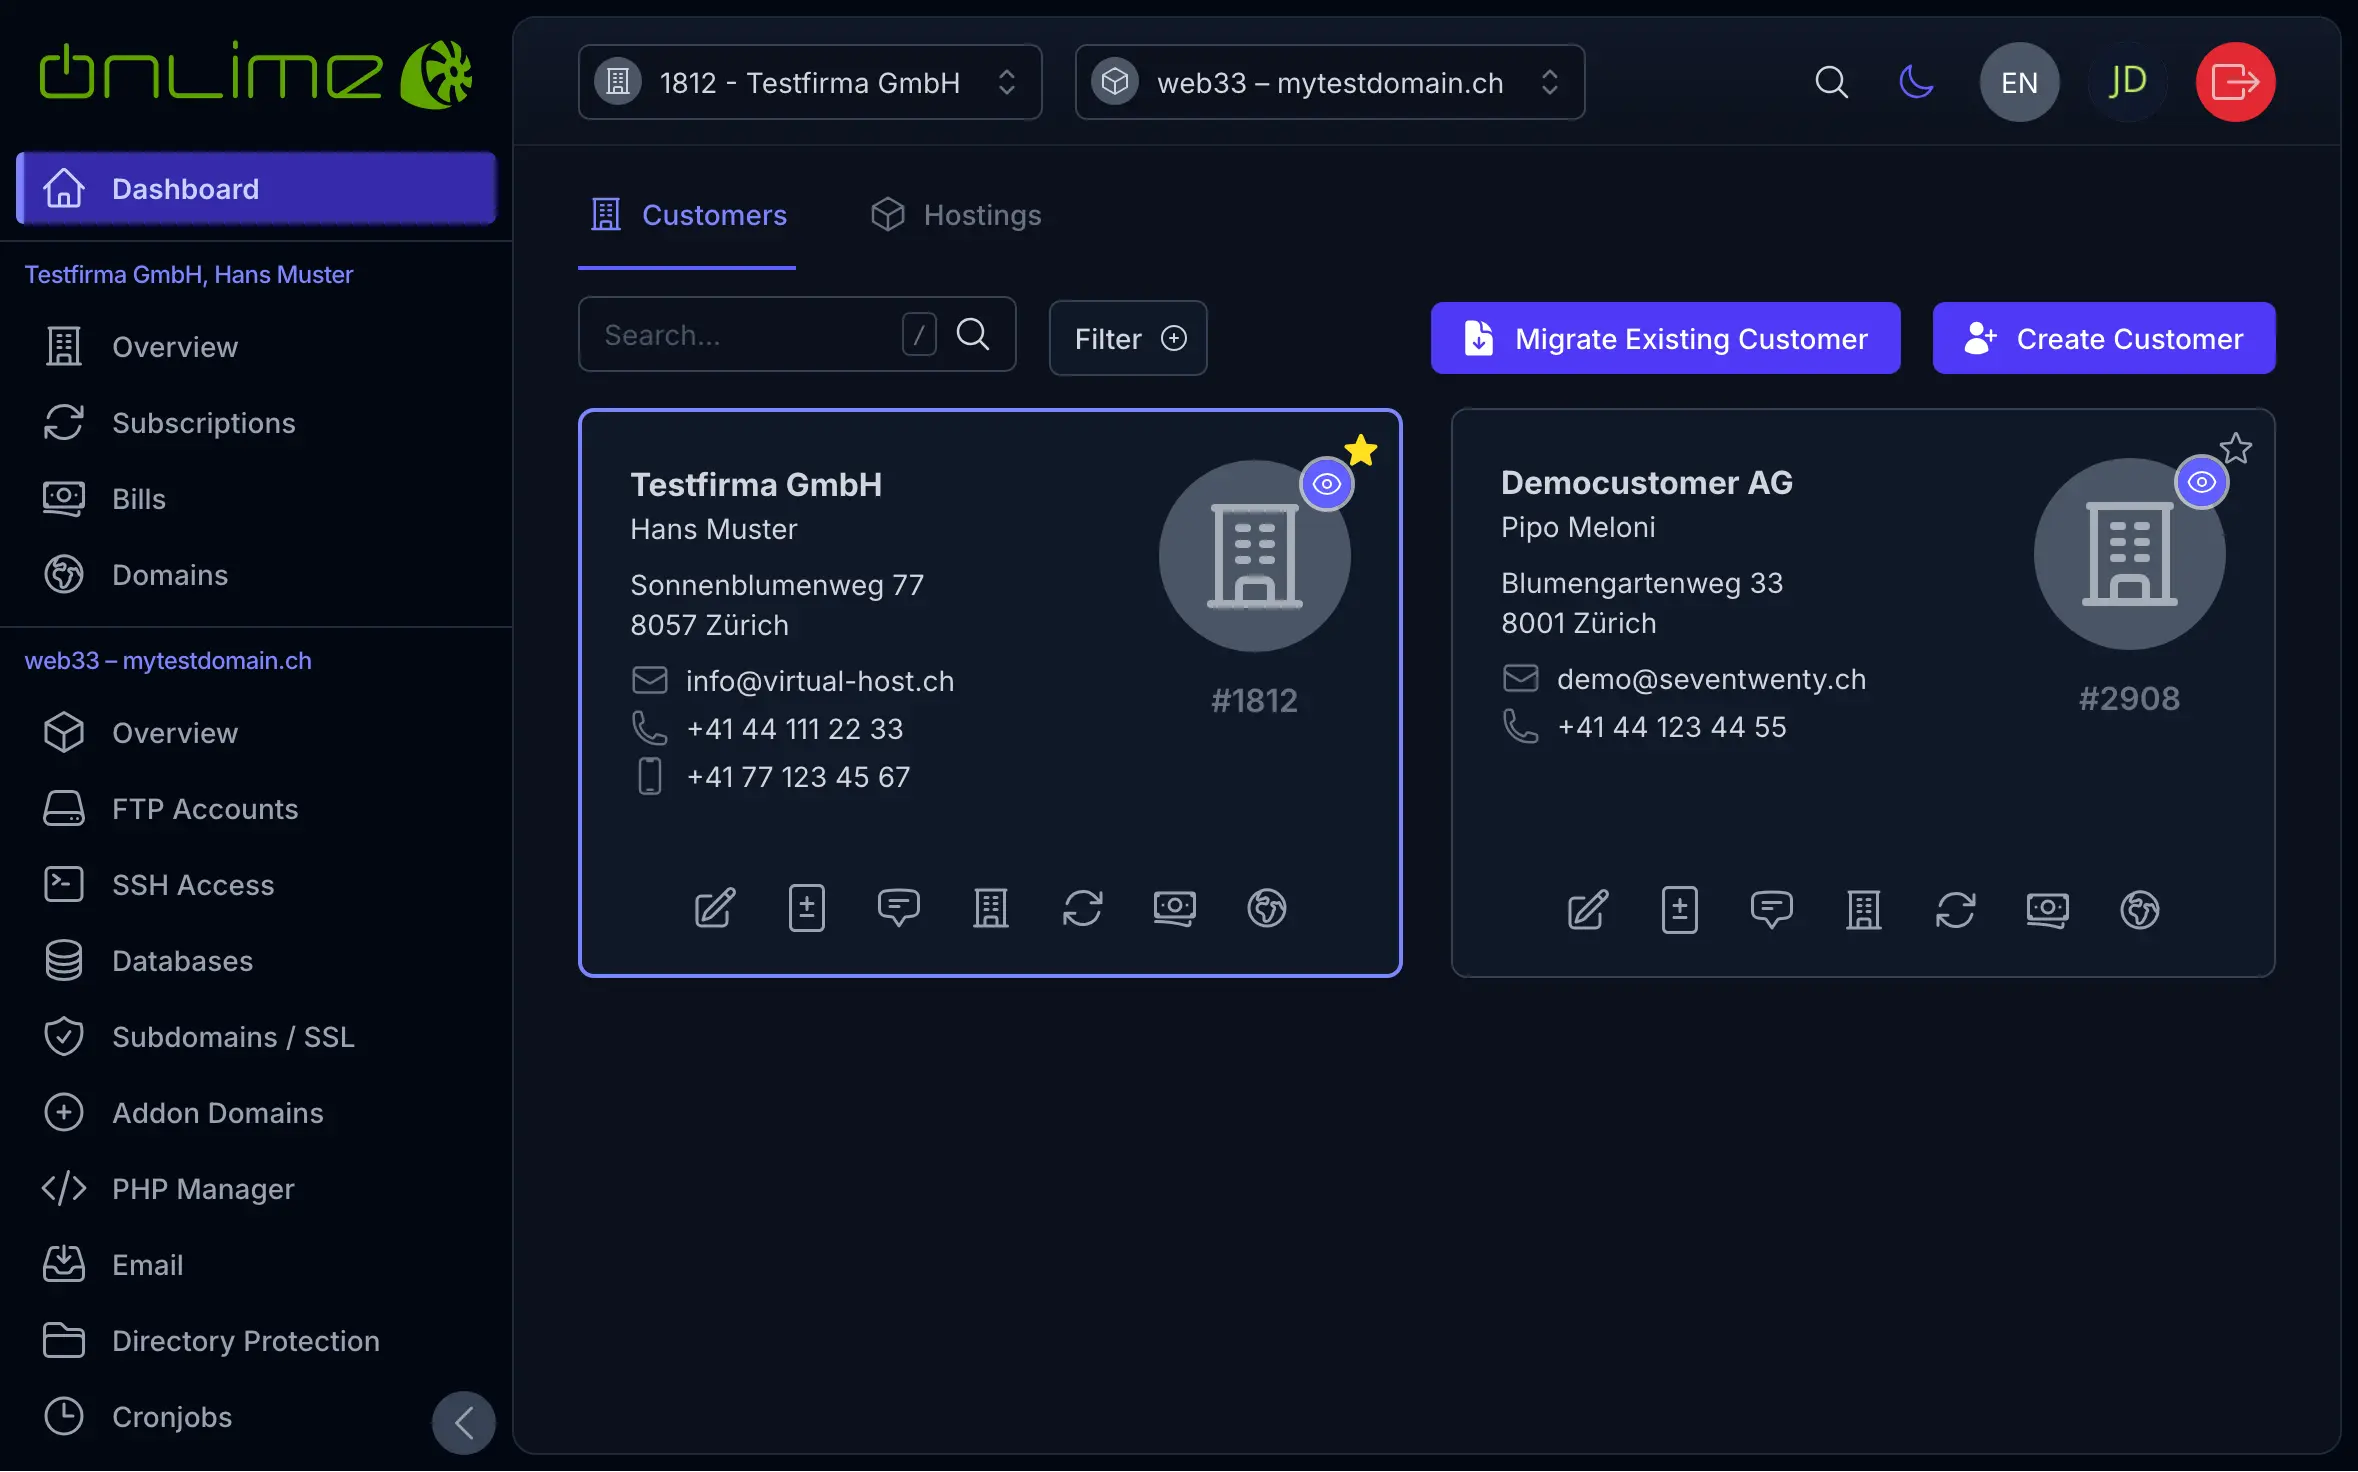
On the customer overview page, you will now see all configured hostings and domains.
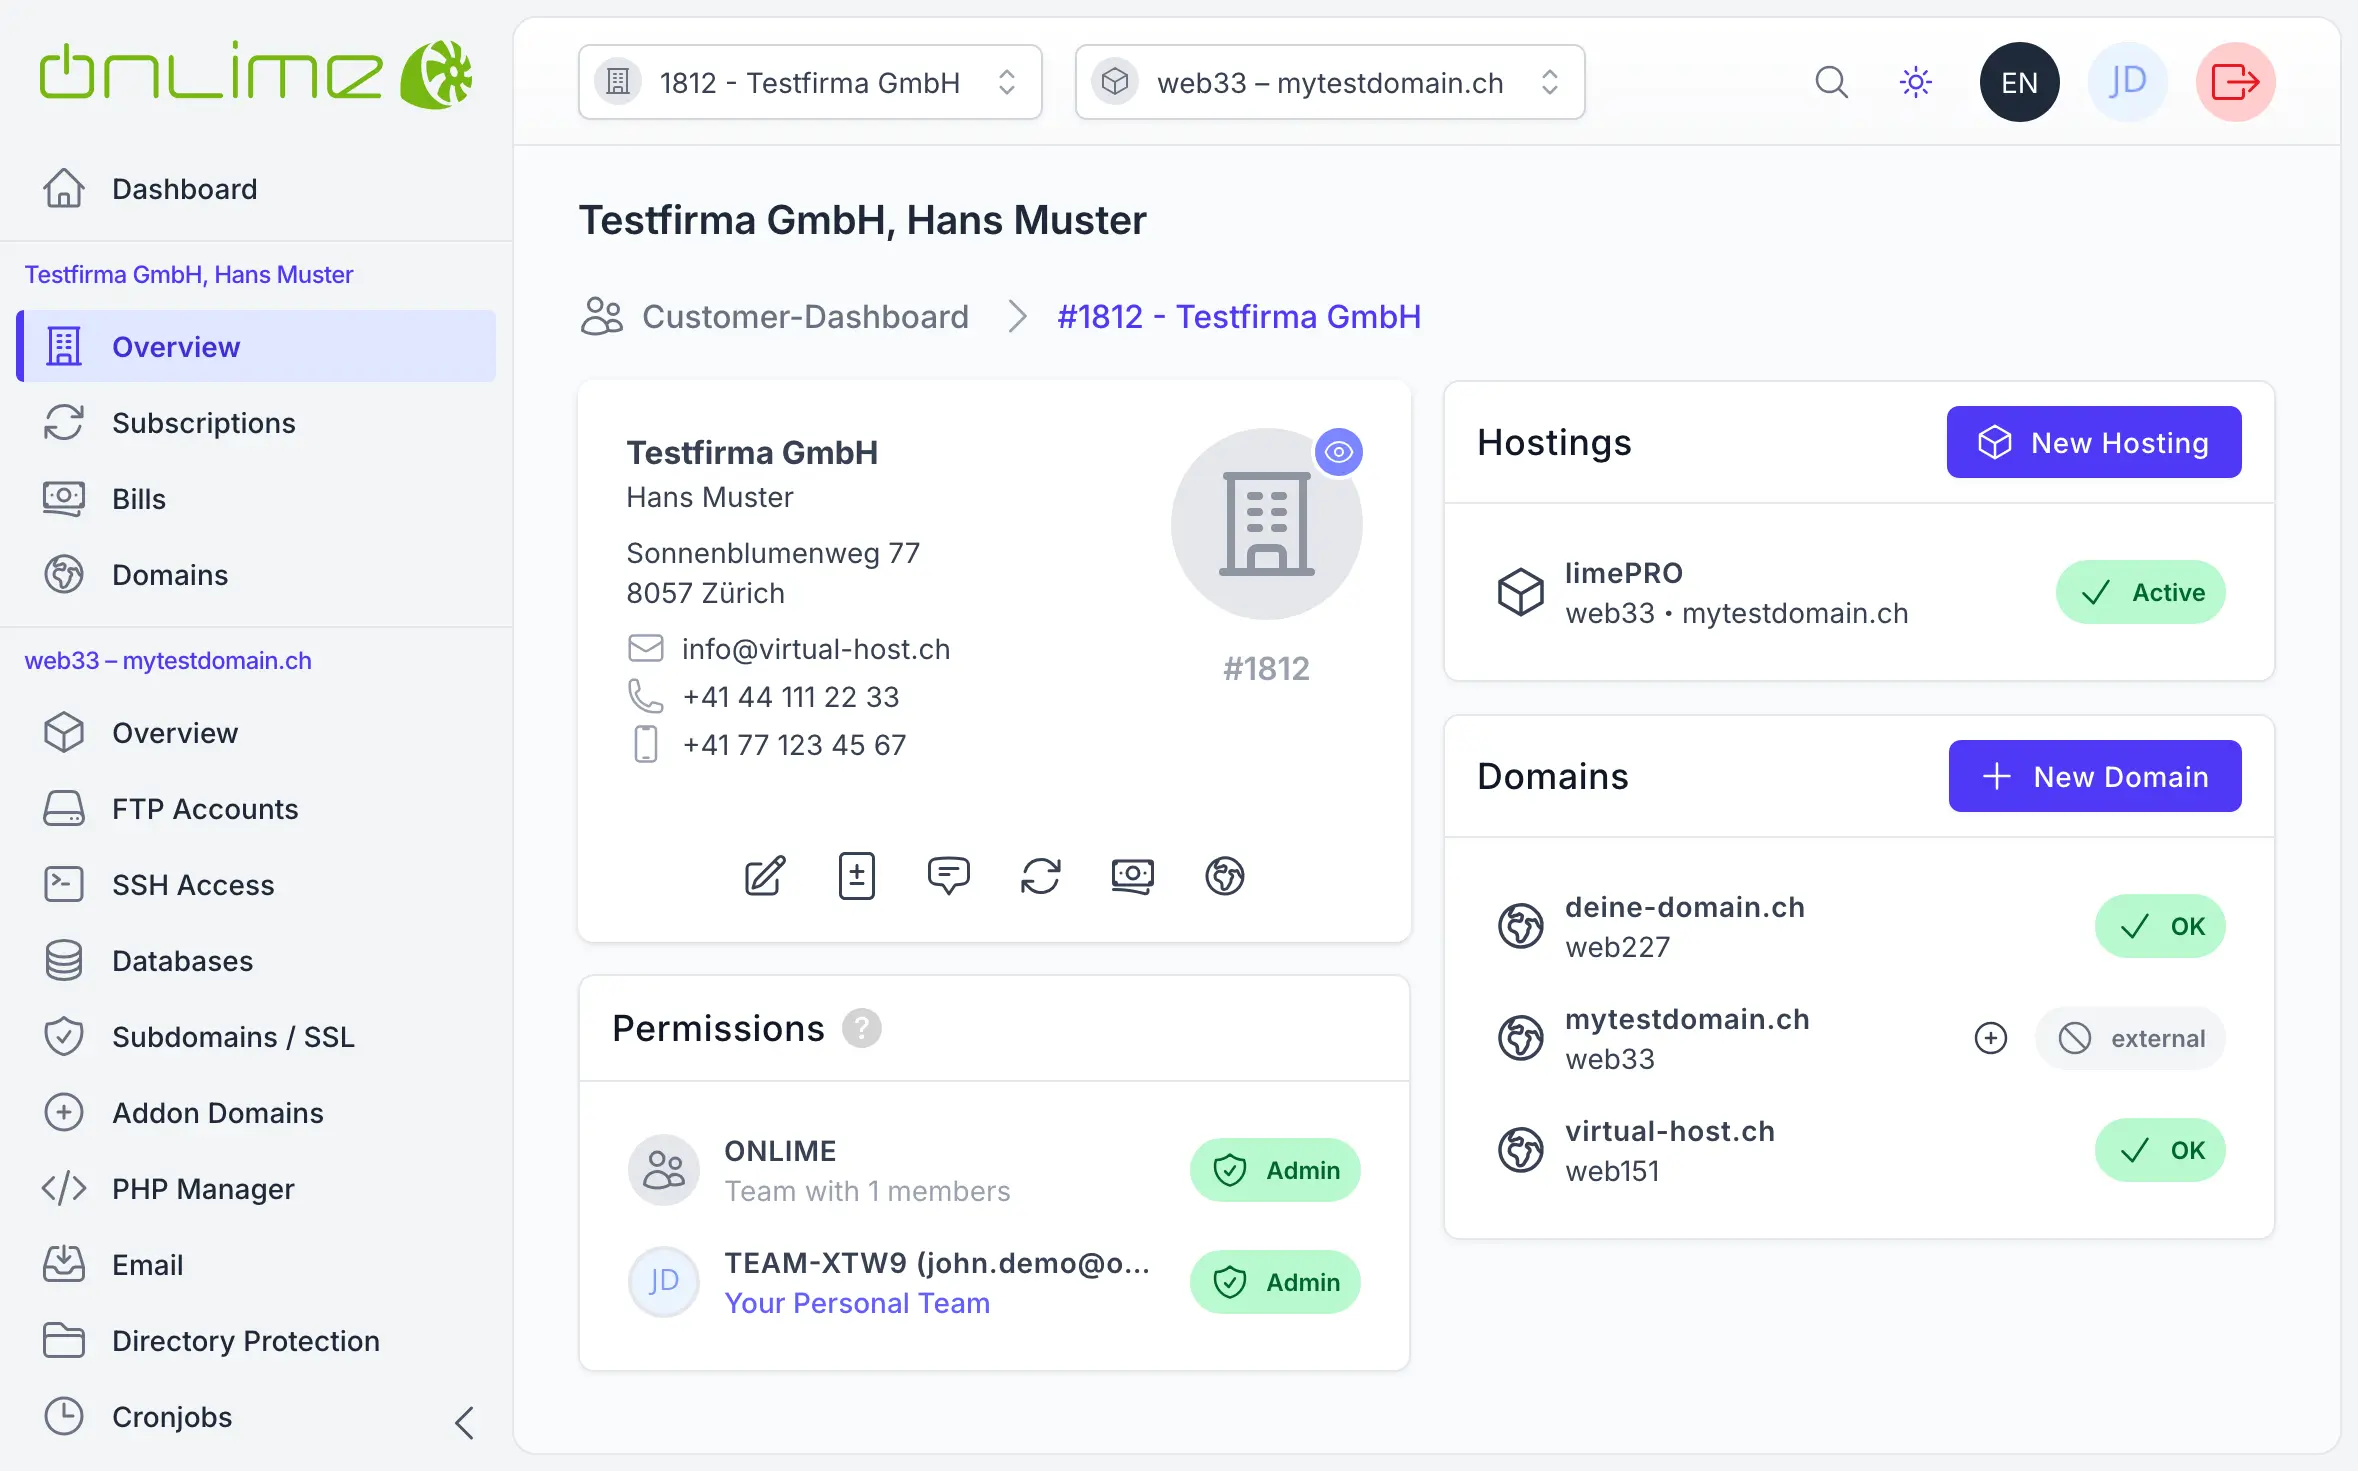

Now click the button.
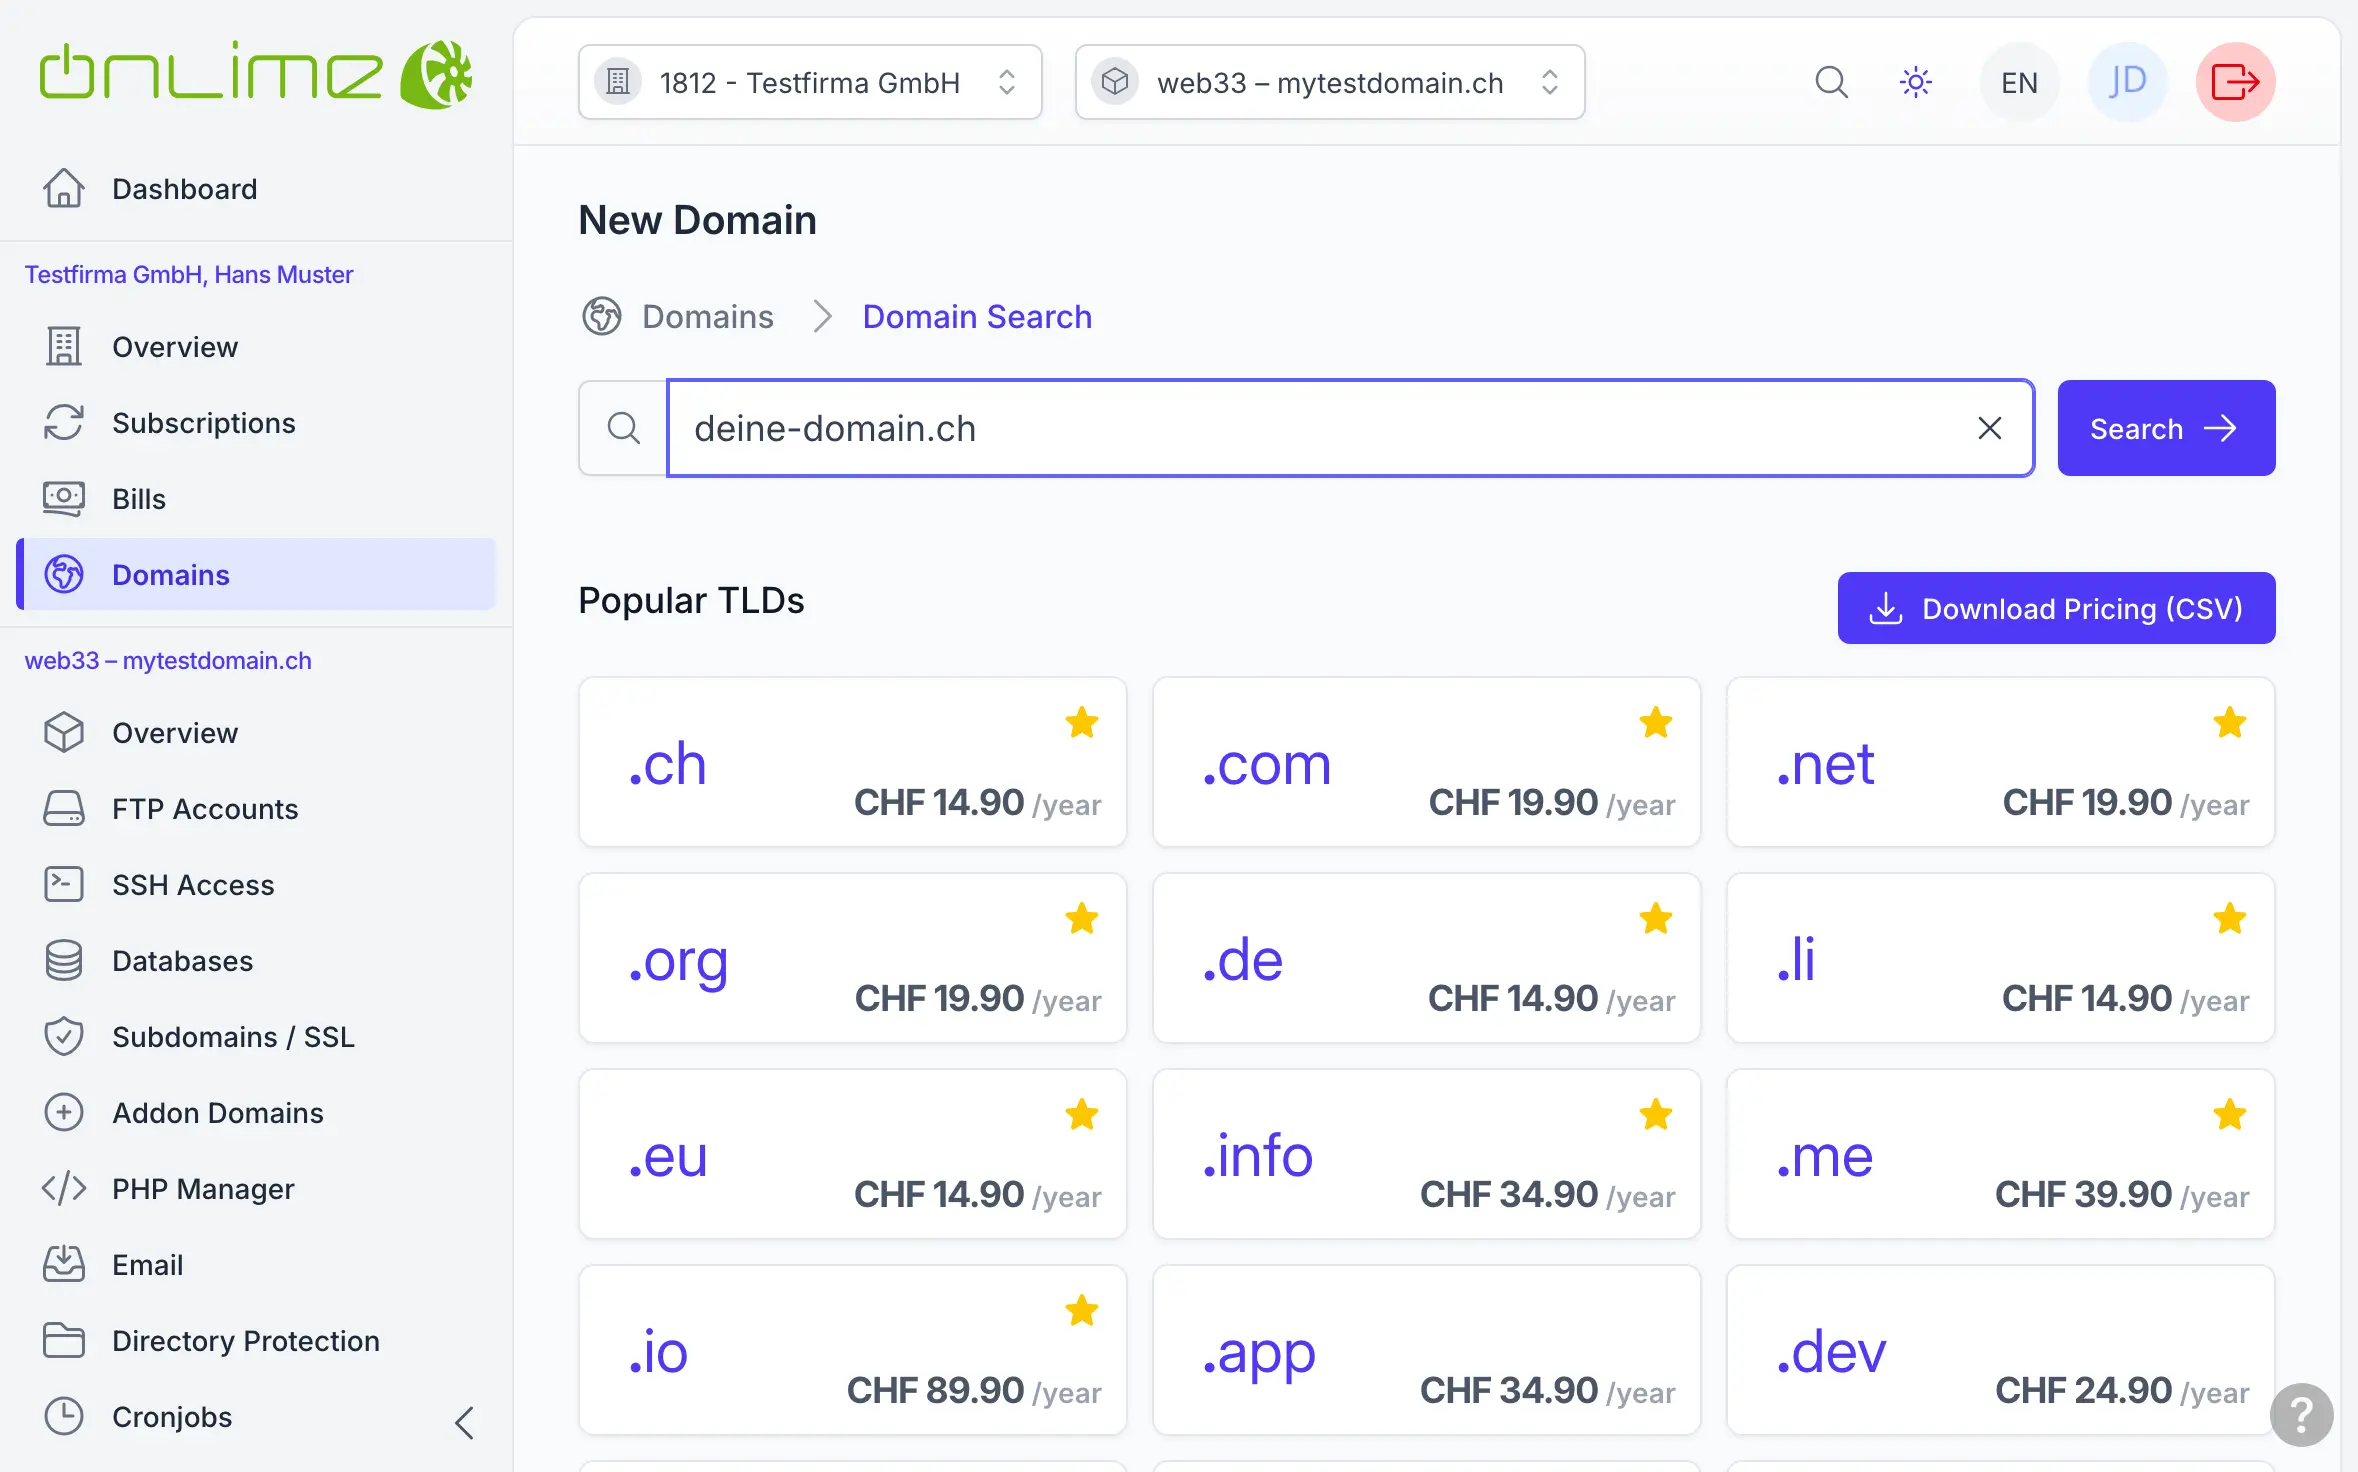
2. Set Up Domain
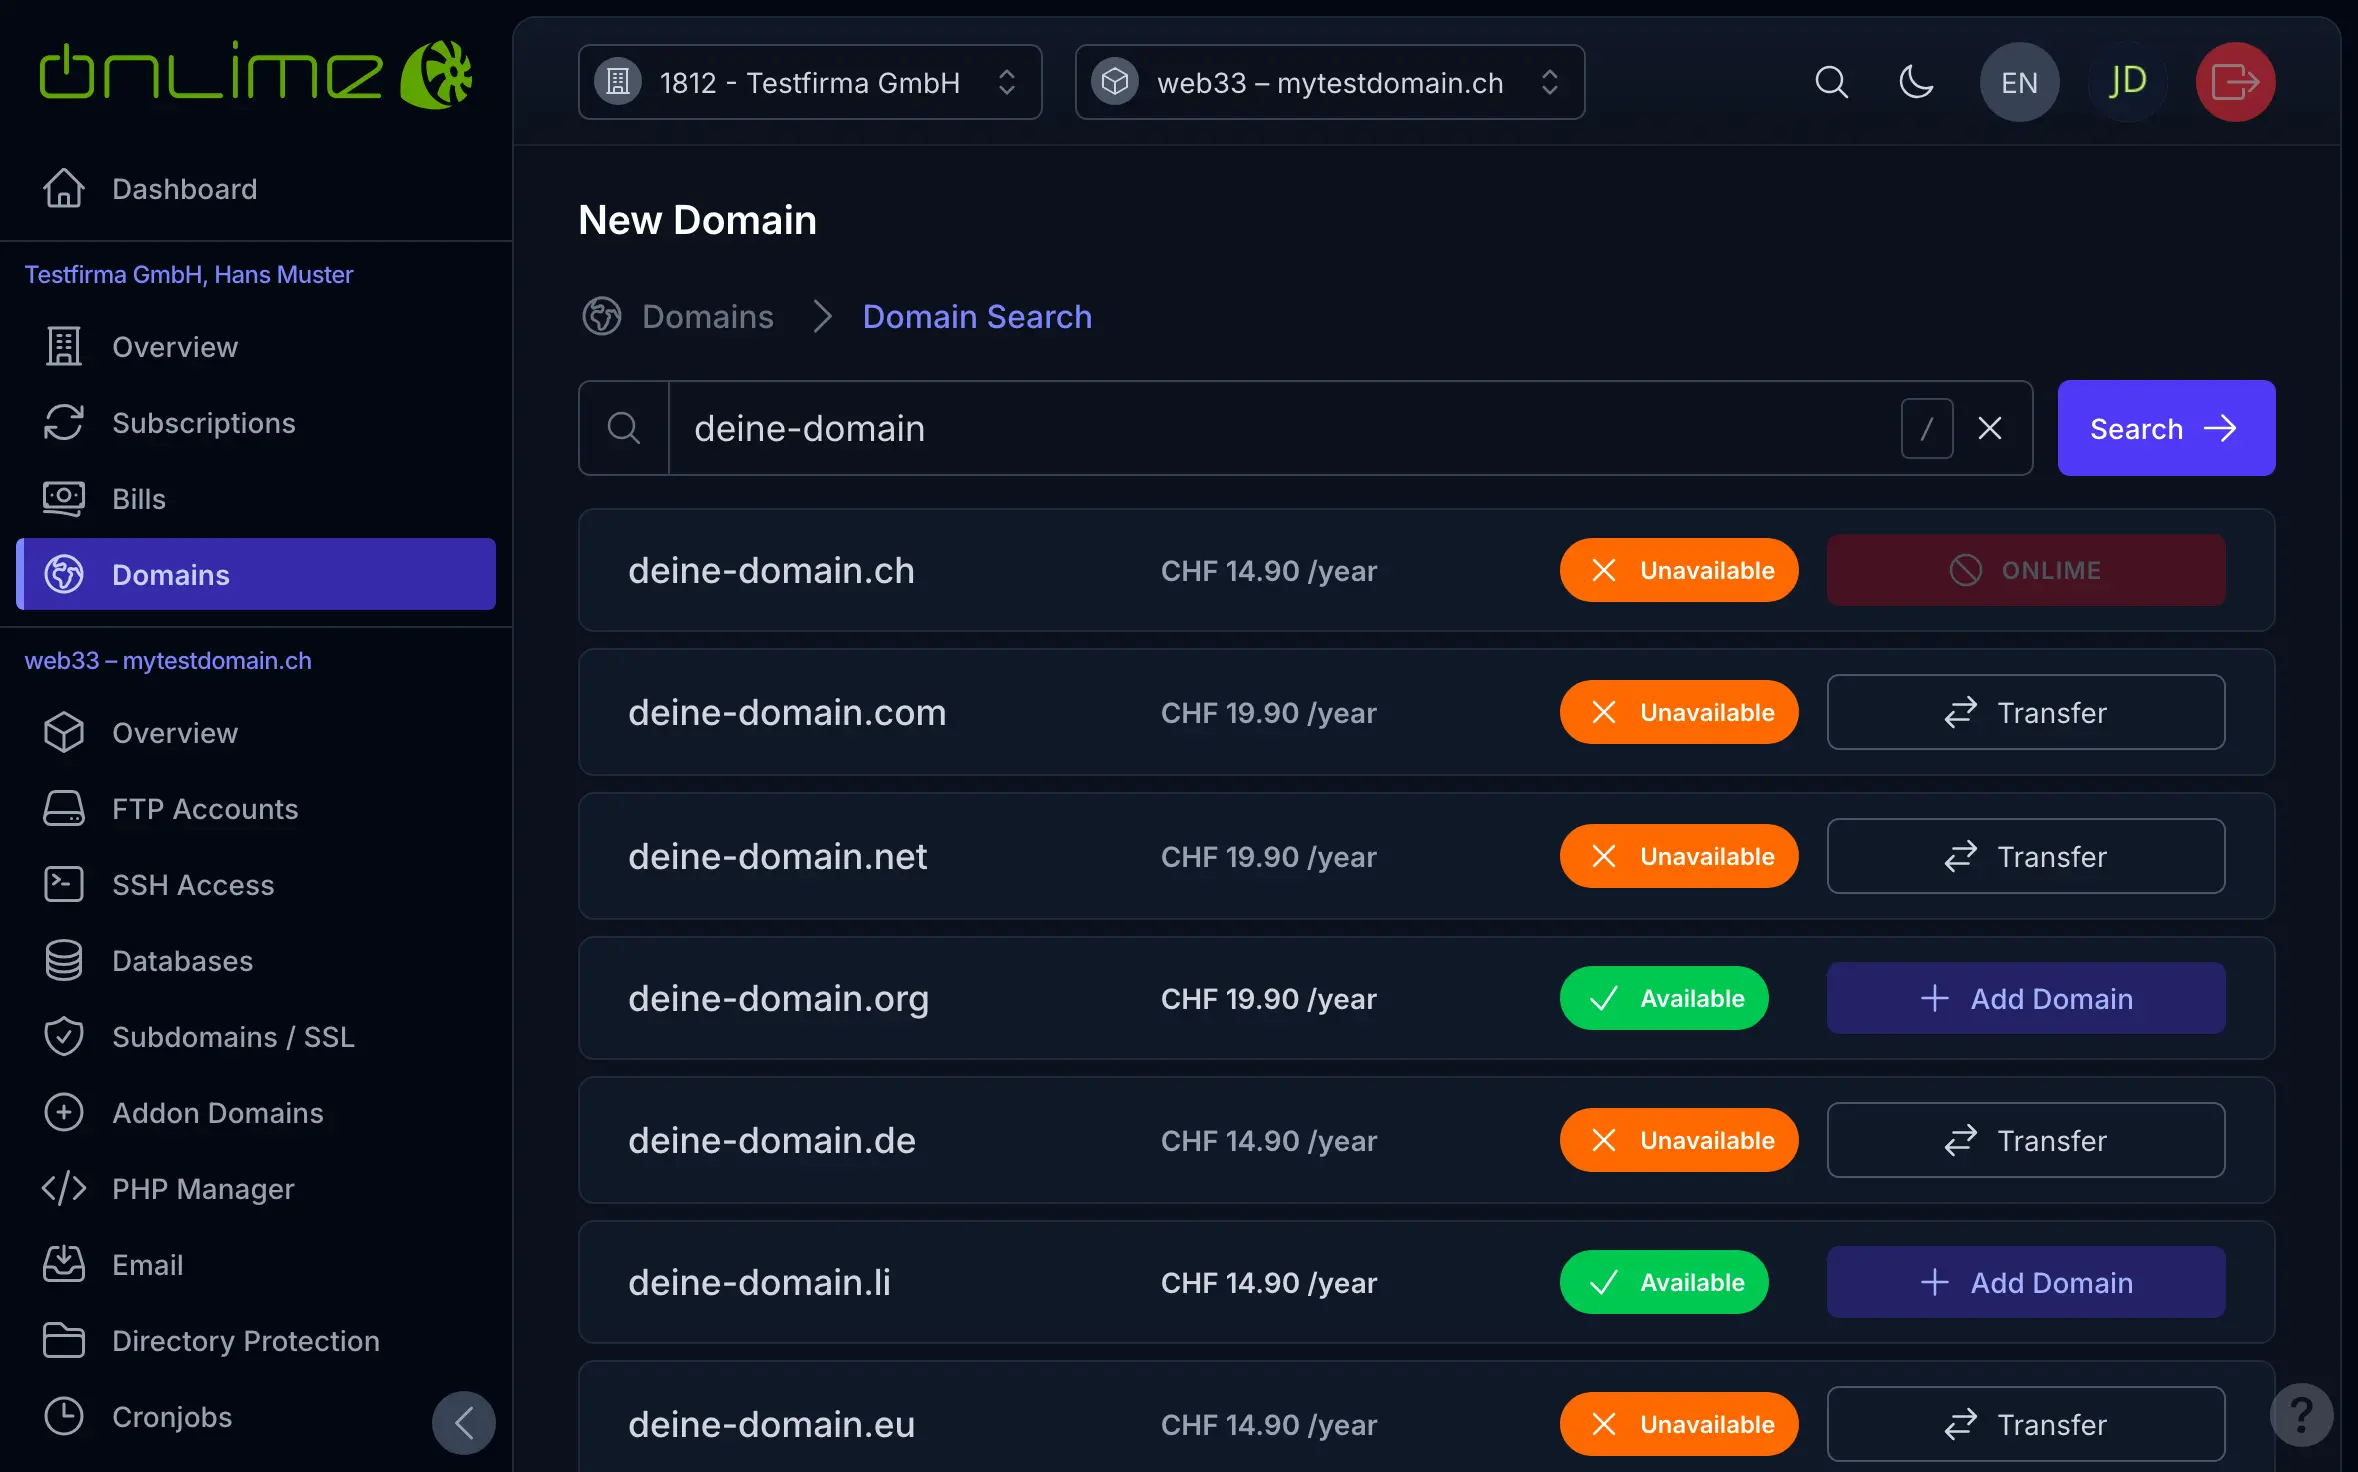
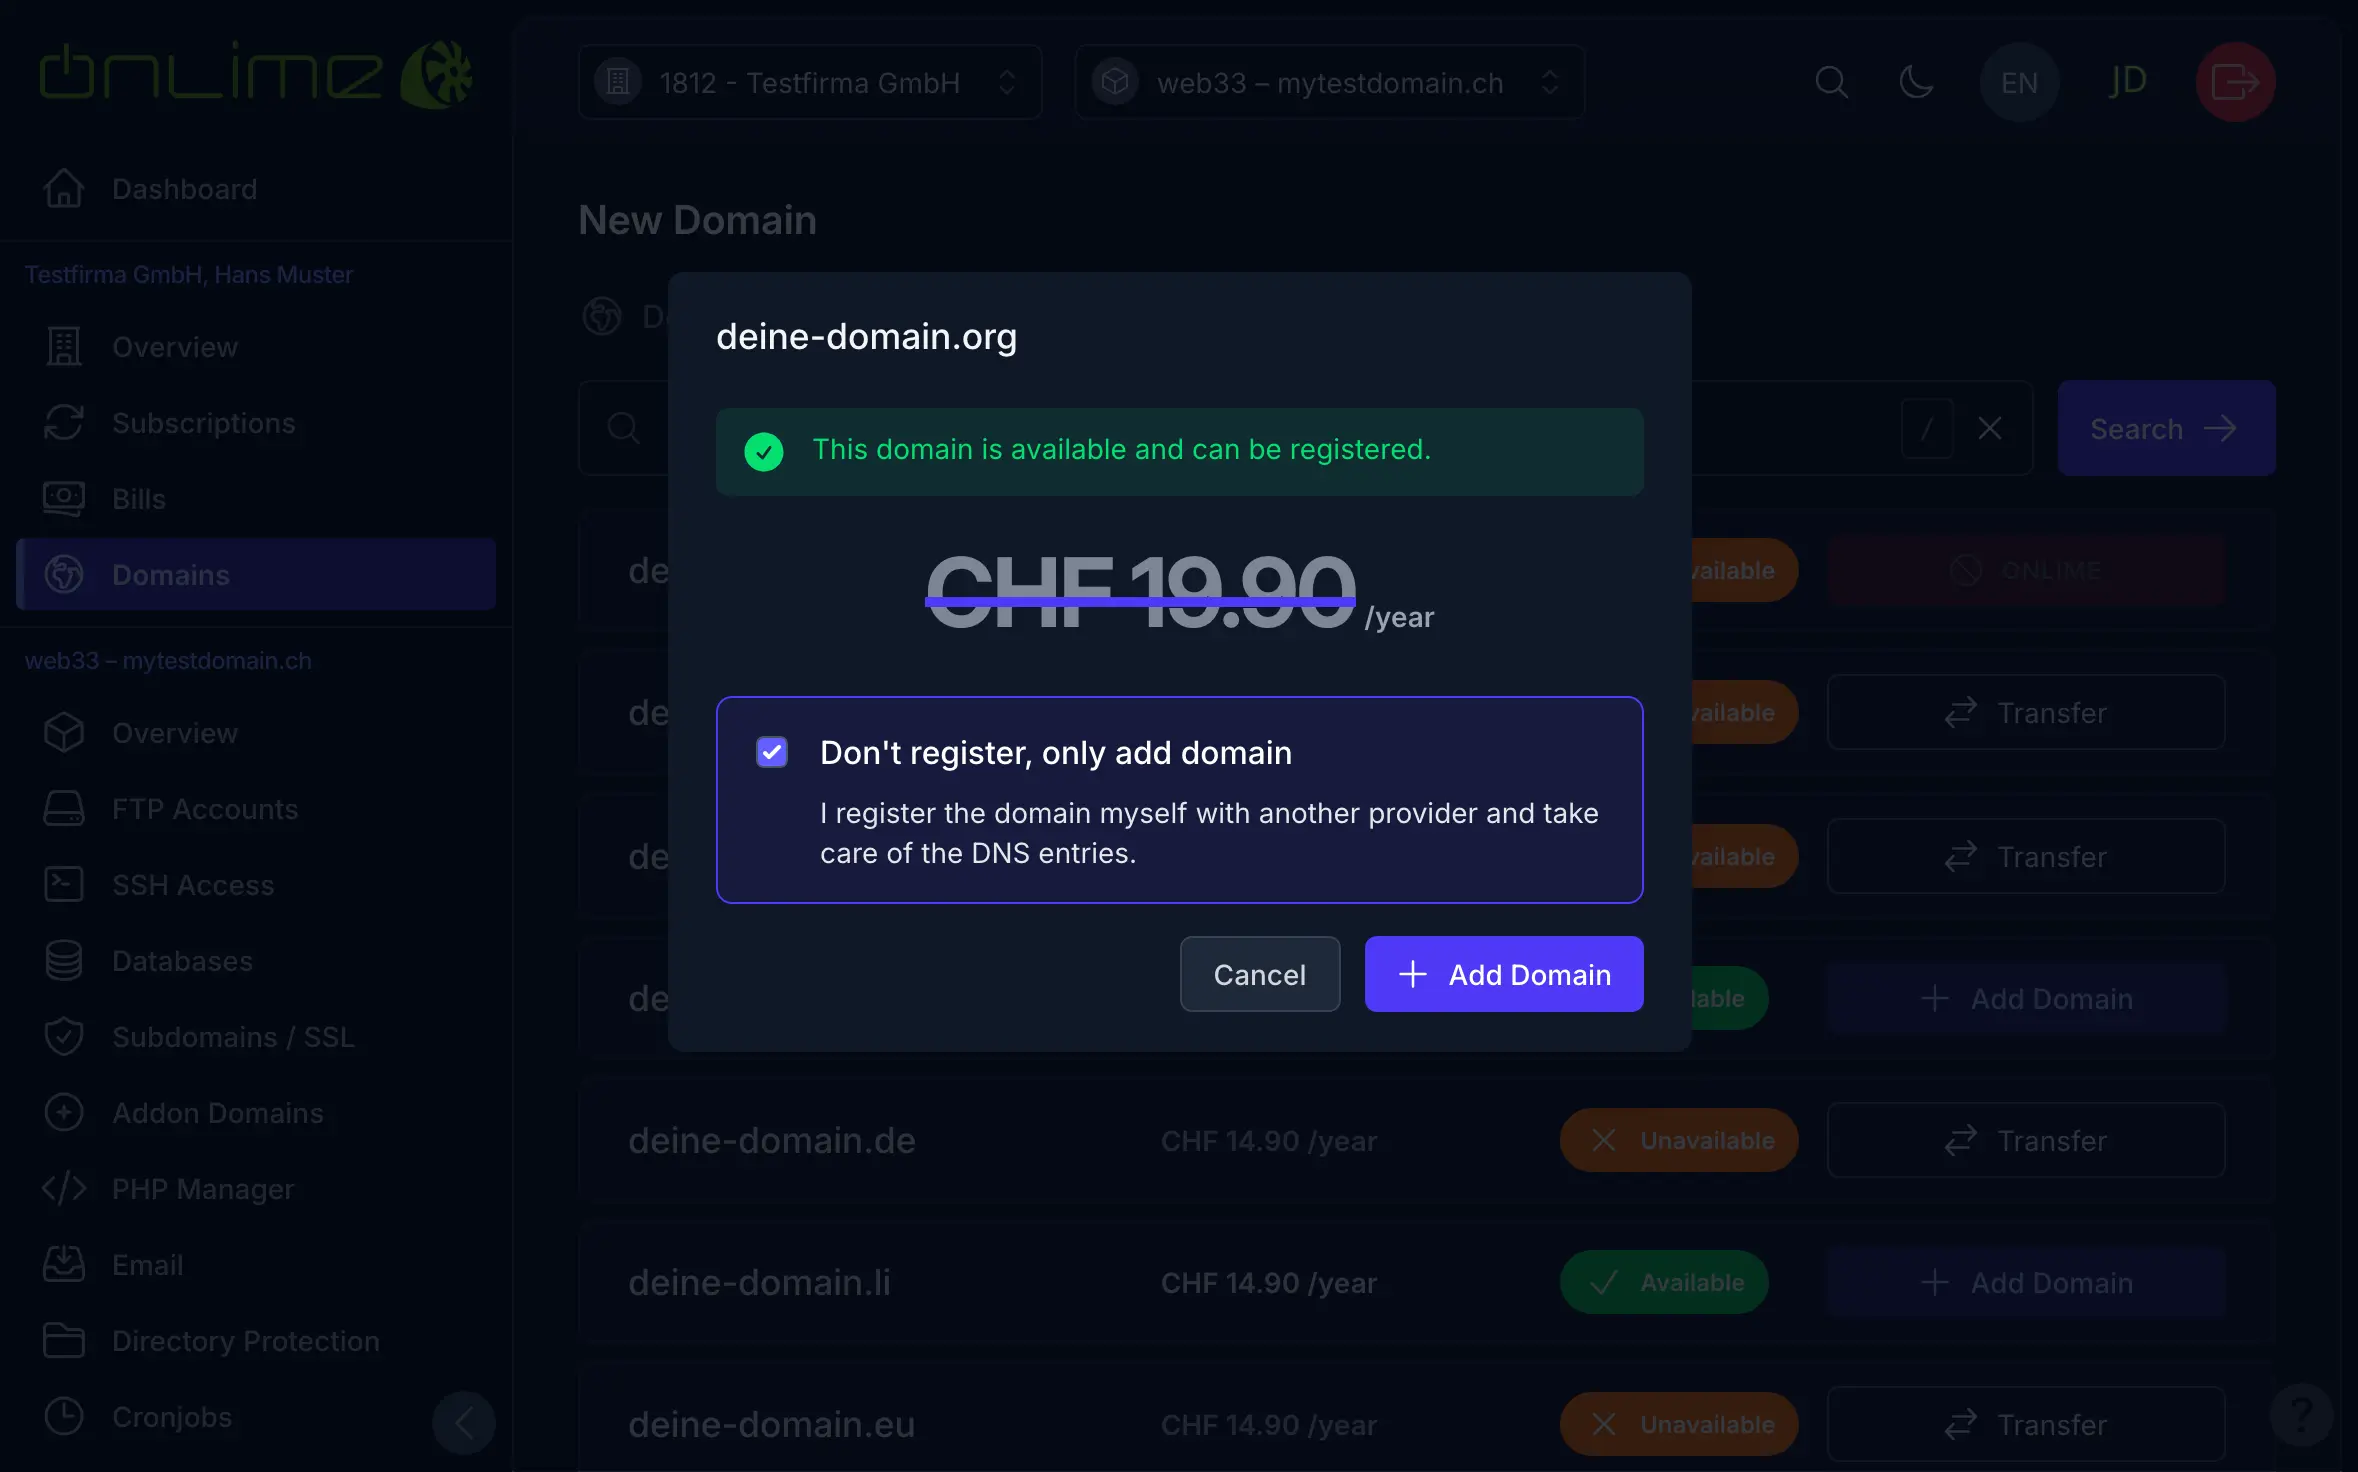
Here you can search for a domain and check its status (availability). You’ll also use this search when adding an existing domain — either to transfer it to us or simply to link a domain that you manage yourself.
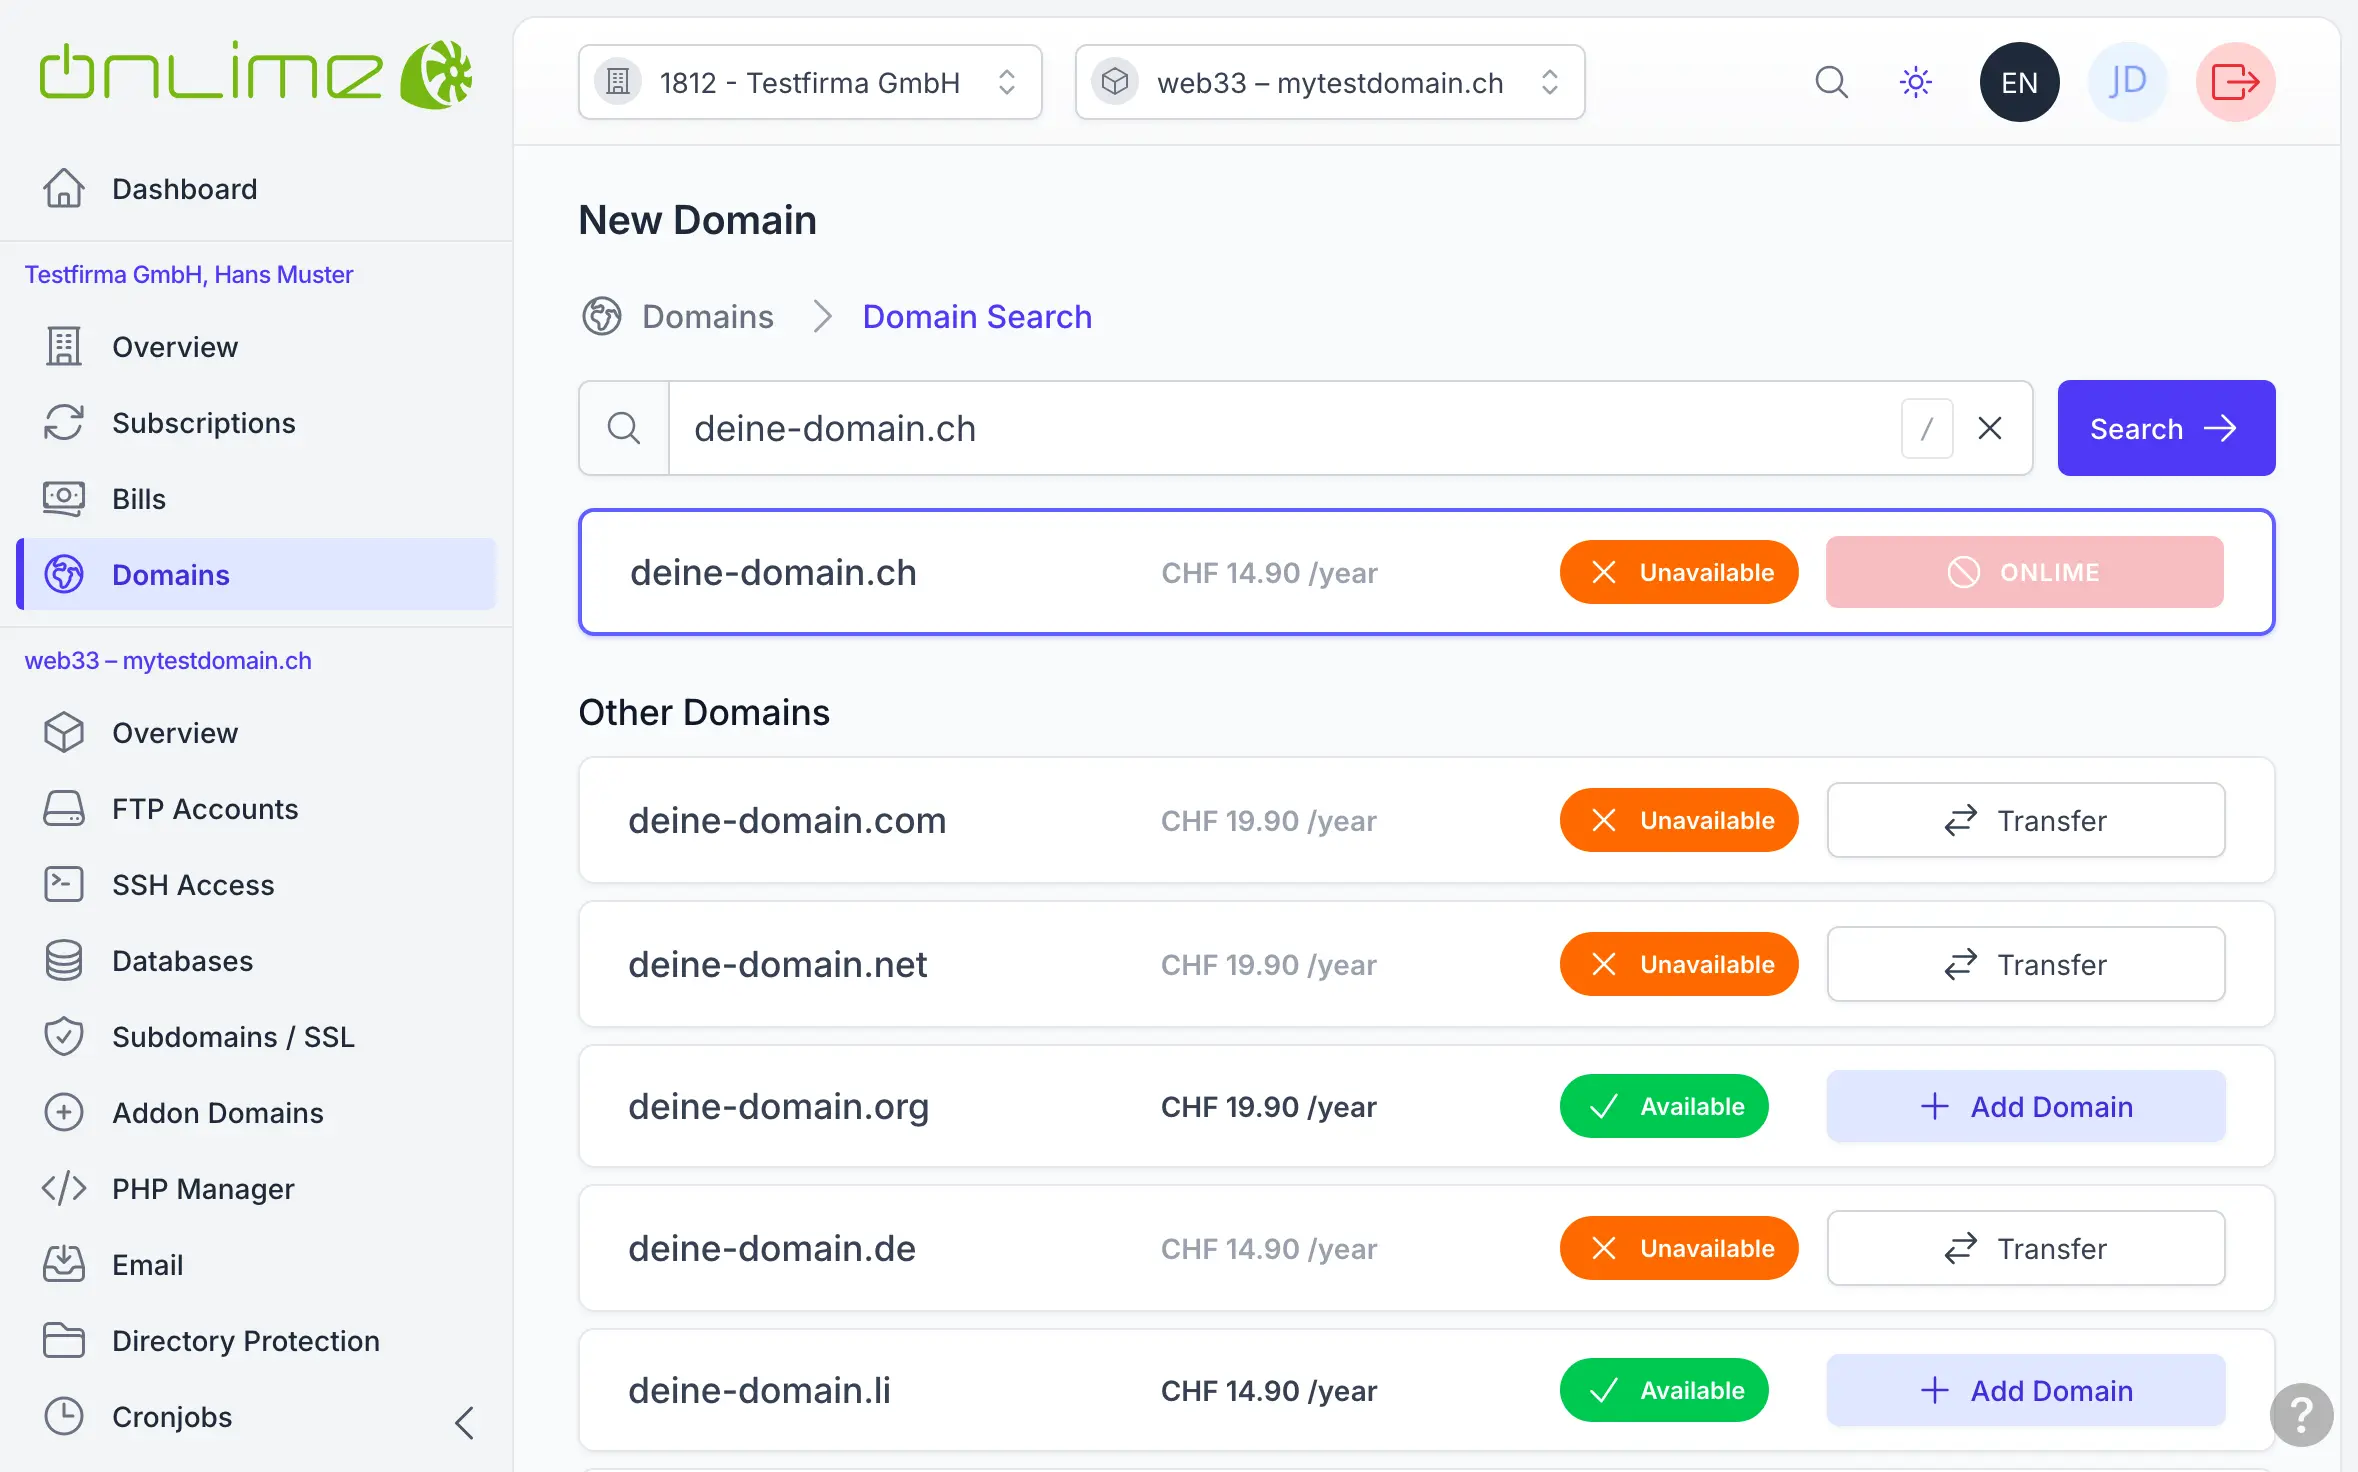
- If a domain is Available, it can be newly registered.
- If it is Unavailable, you can have it transferred by us.
In any case, you must click one of the buttons or !
TIP
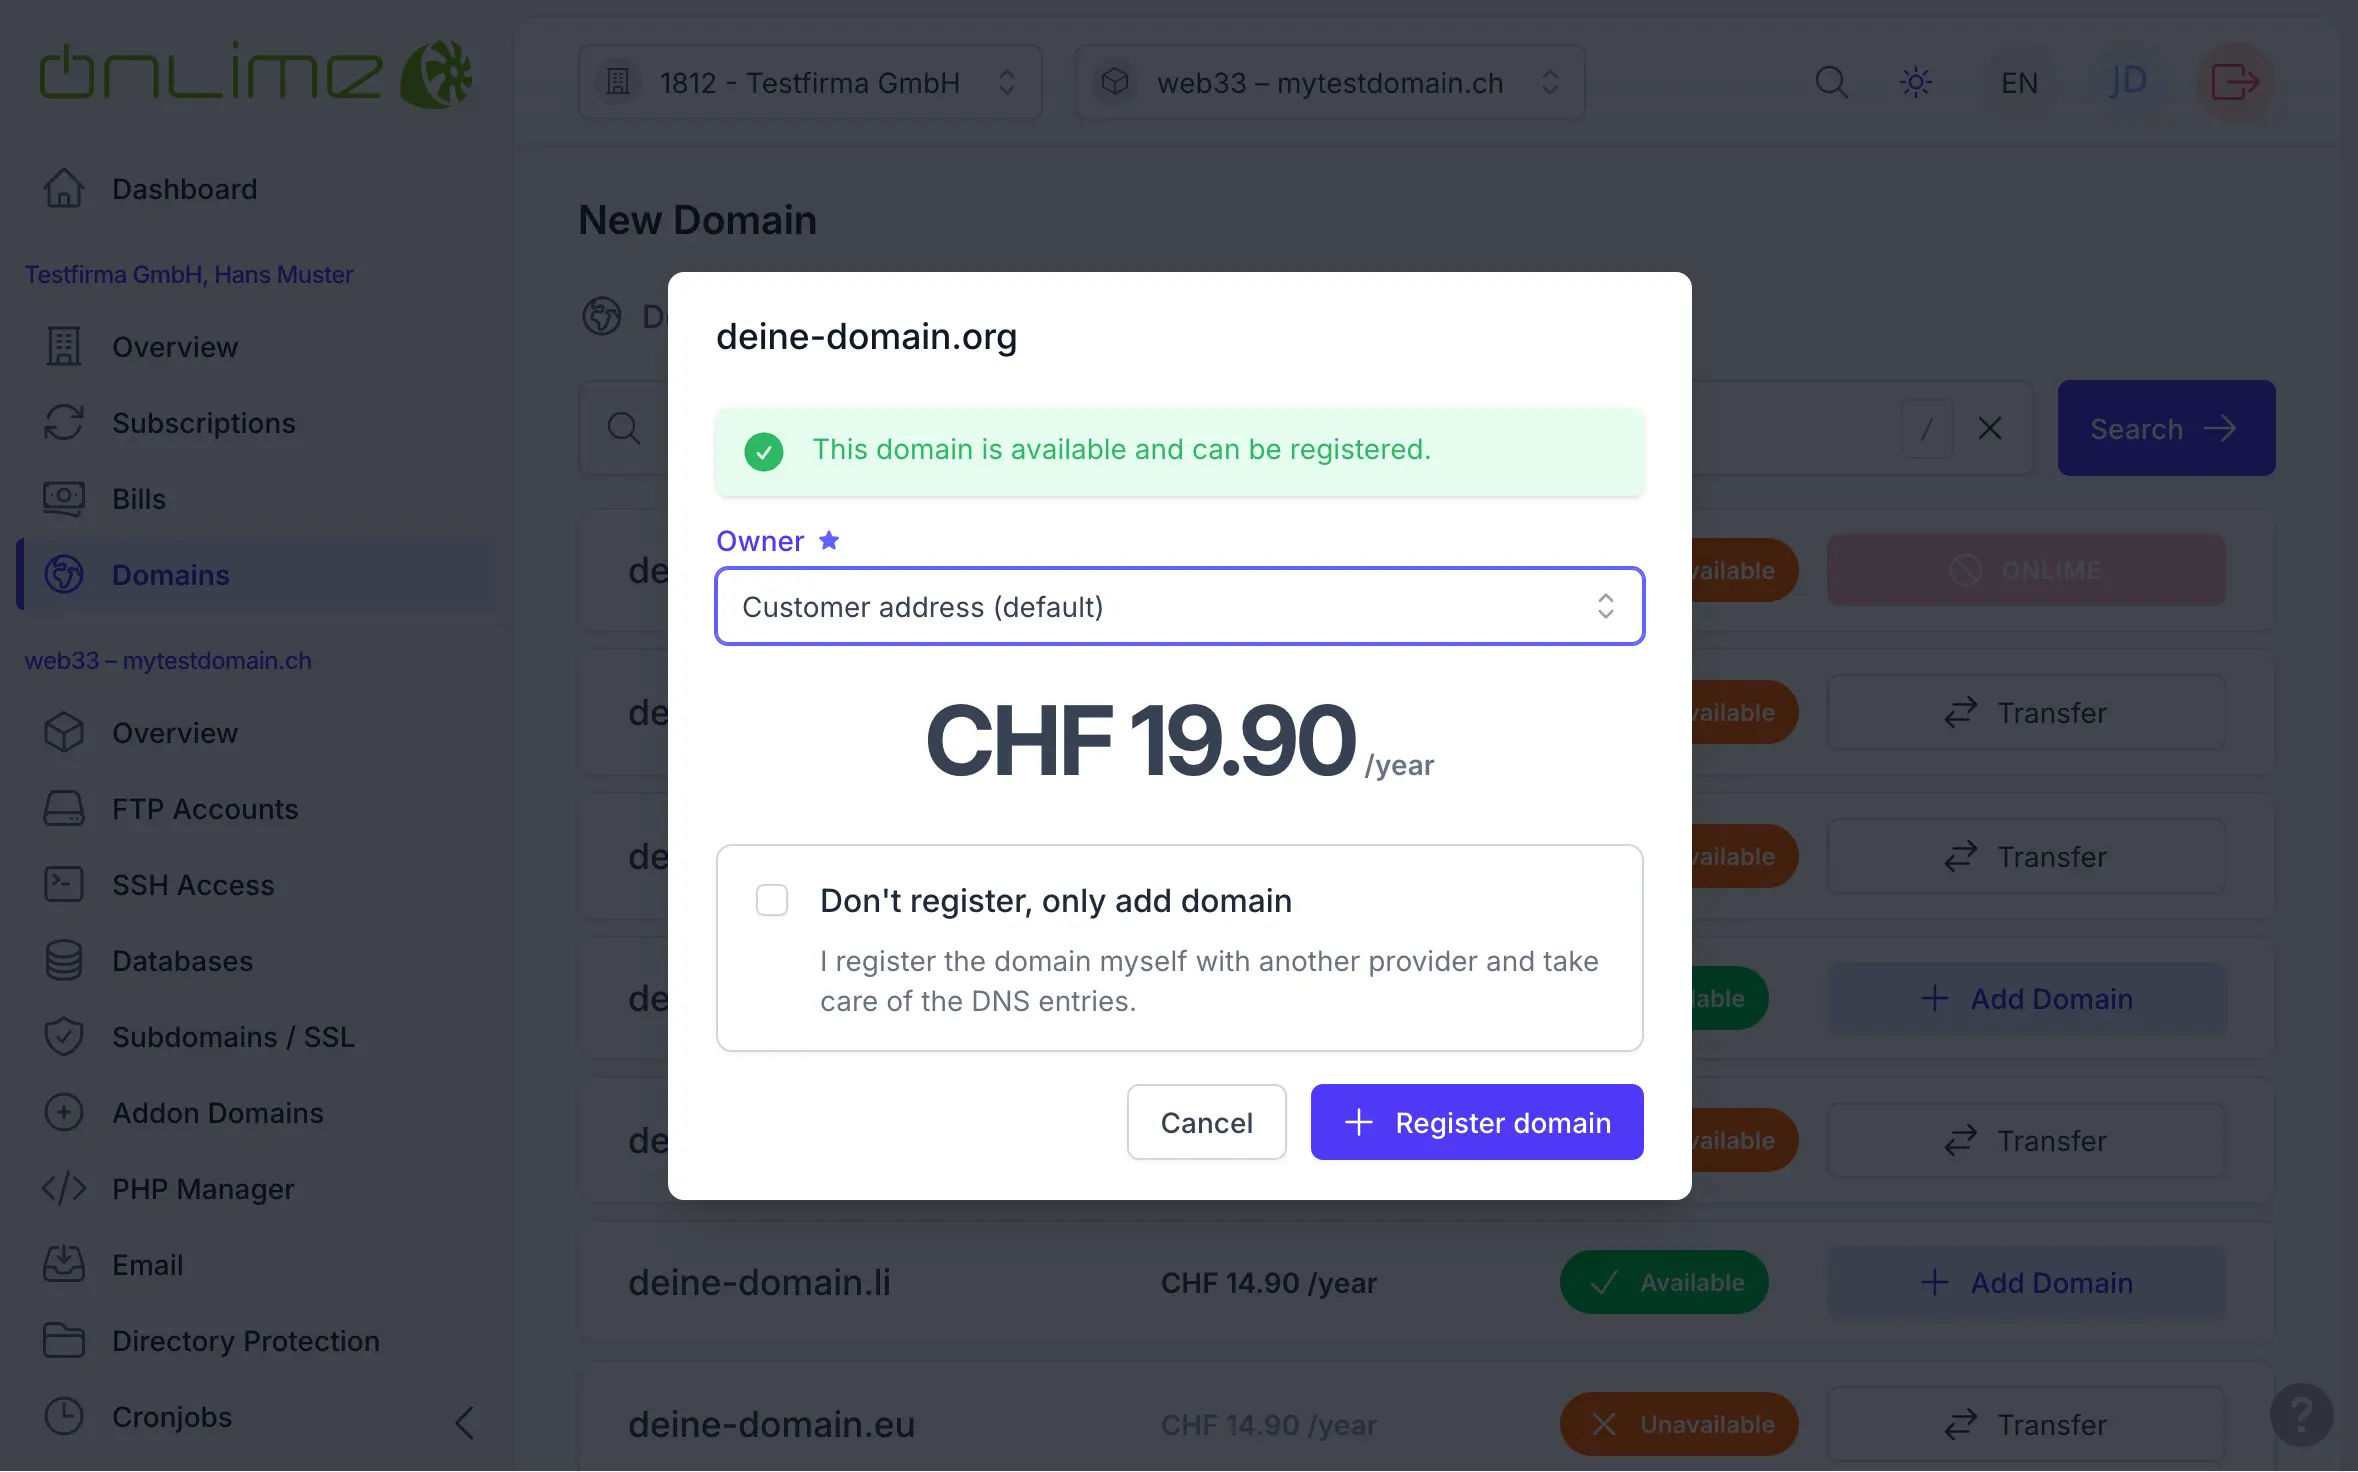
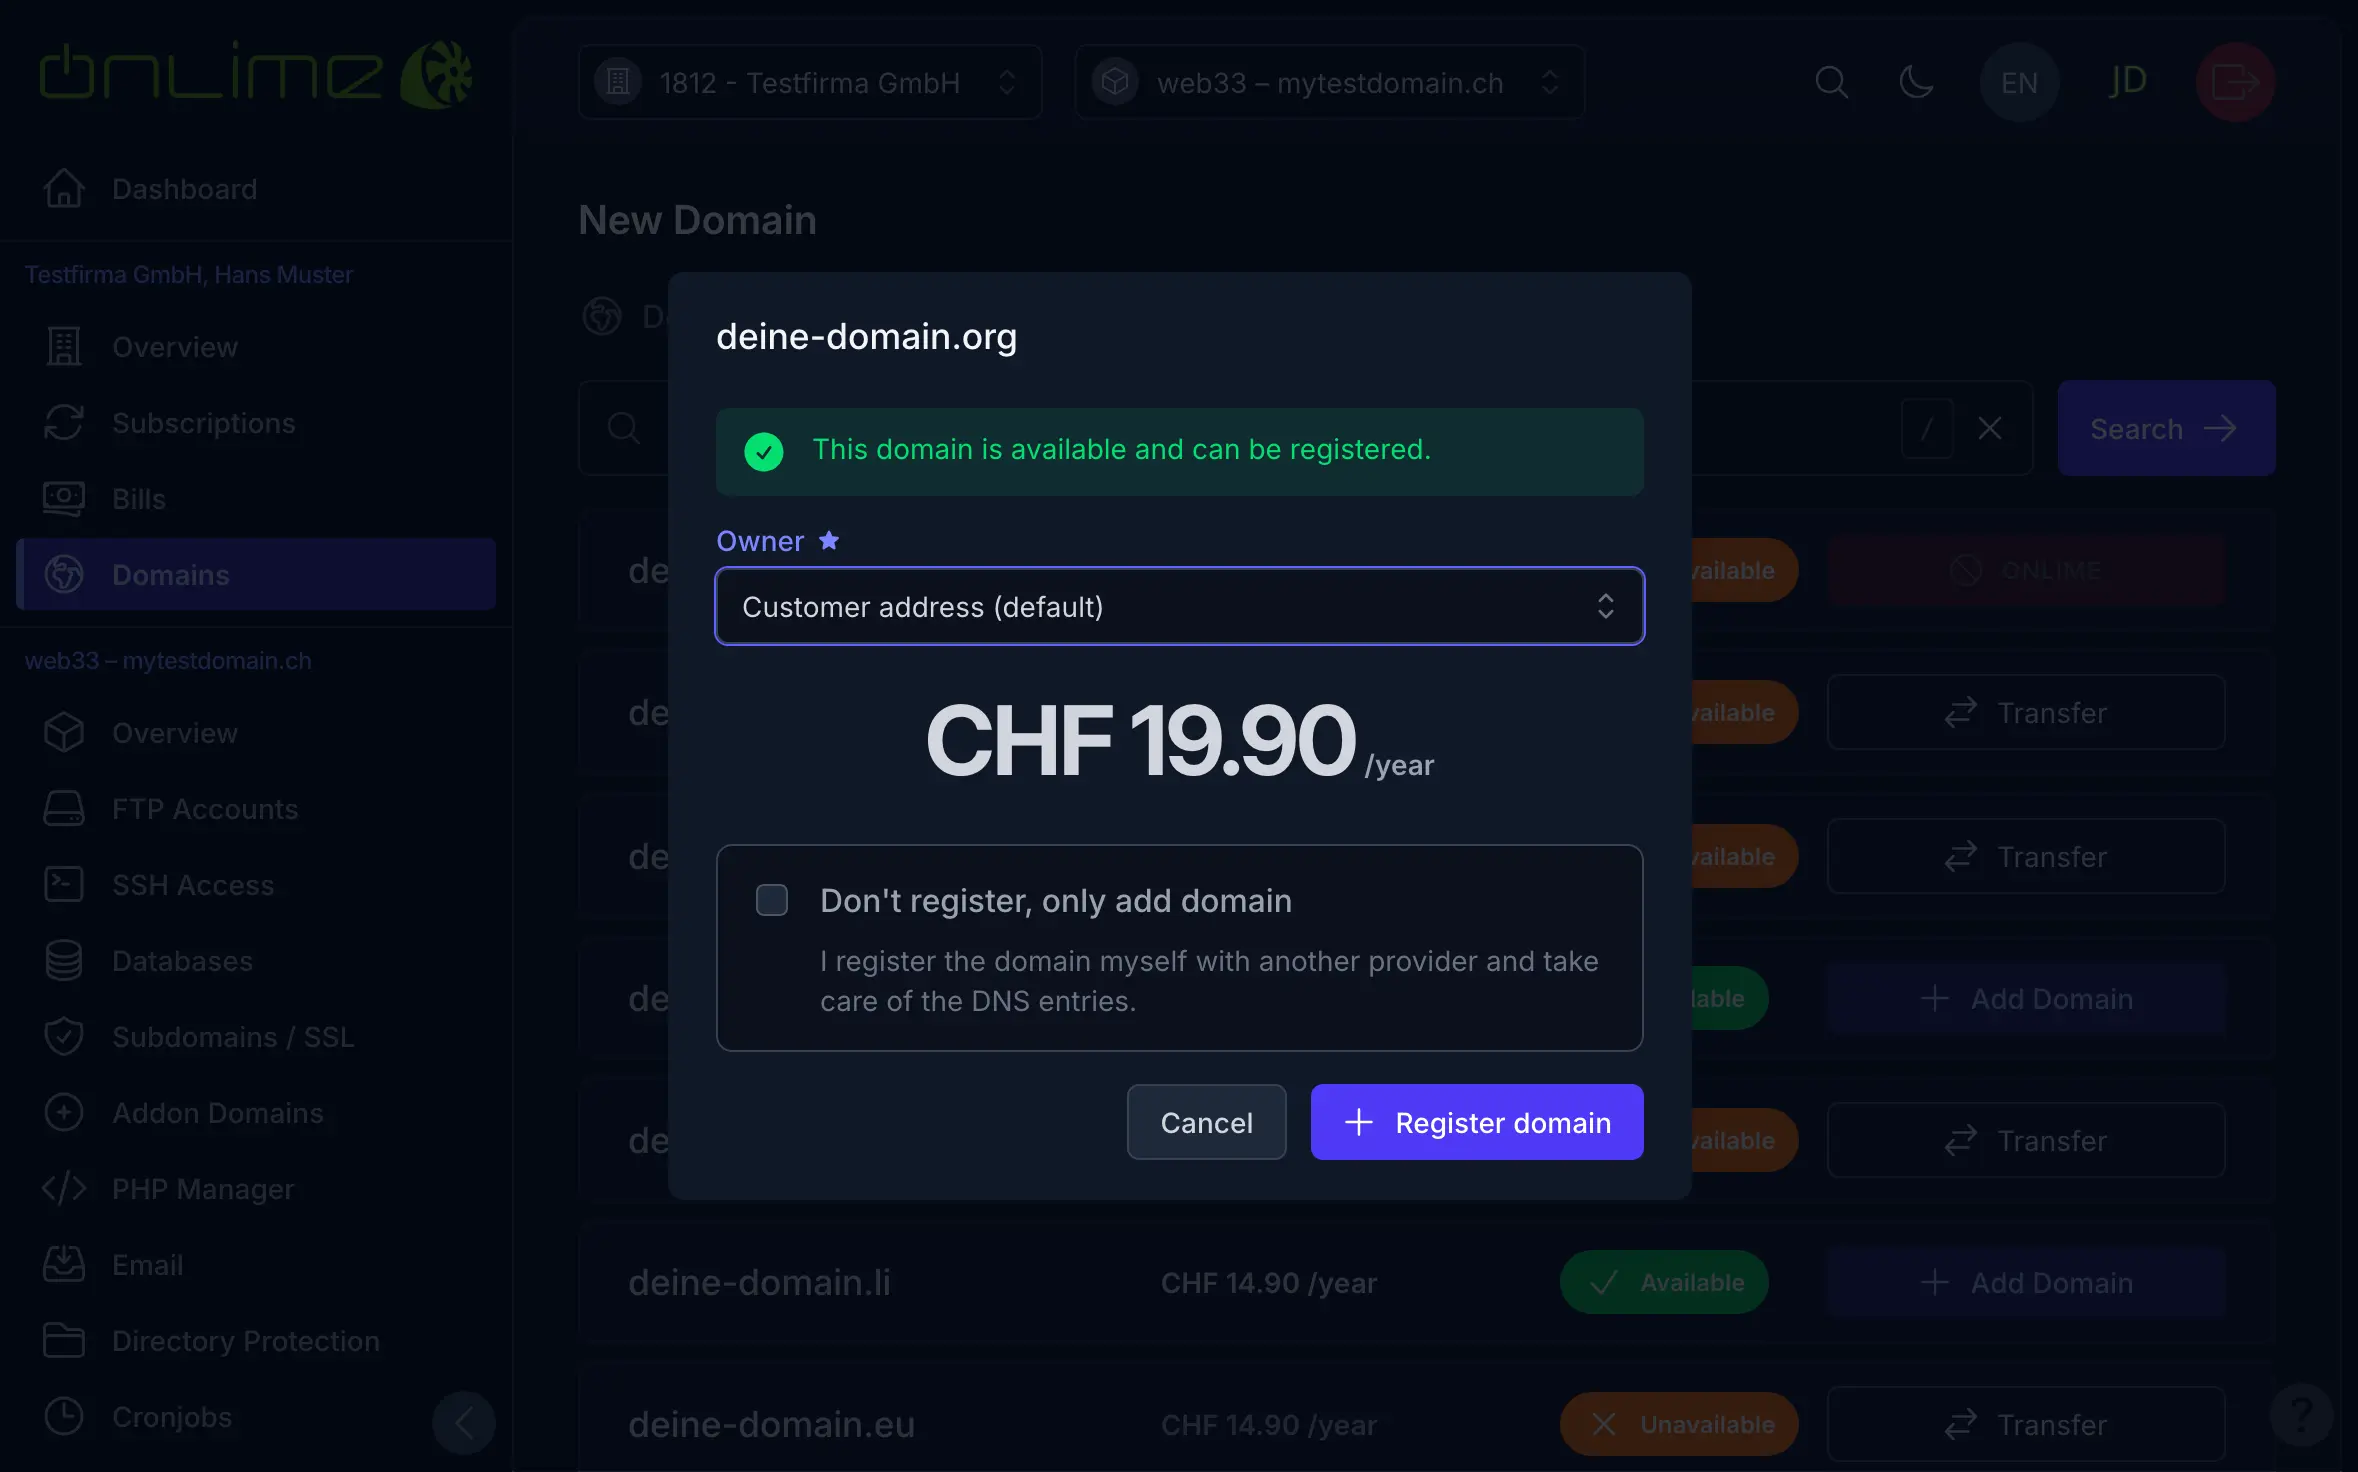
No worries — in the next step, you will find the option to simply add the domain (without registering/transferring it) and manage it yourself through another registrar.
Now click to start the domain registration. Or simply choose the option «Do not register, only add domain» and click on — you can easily register or transfer it through us later if you wish.
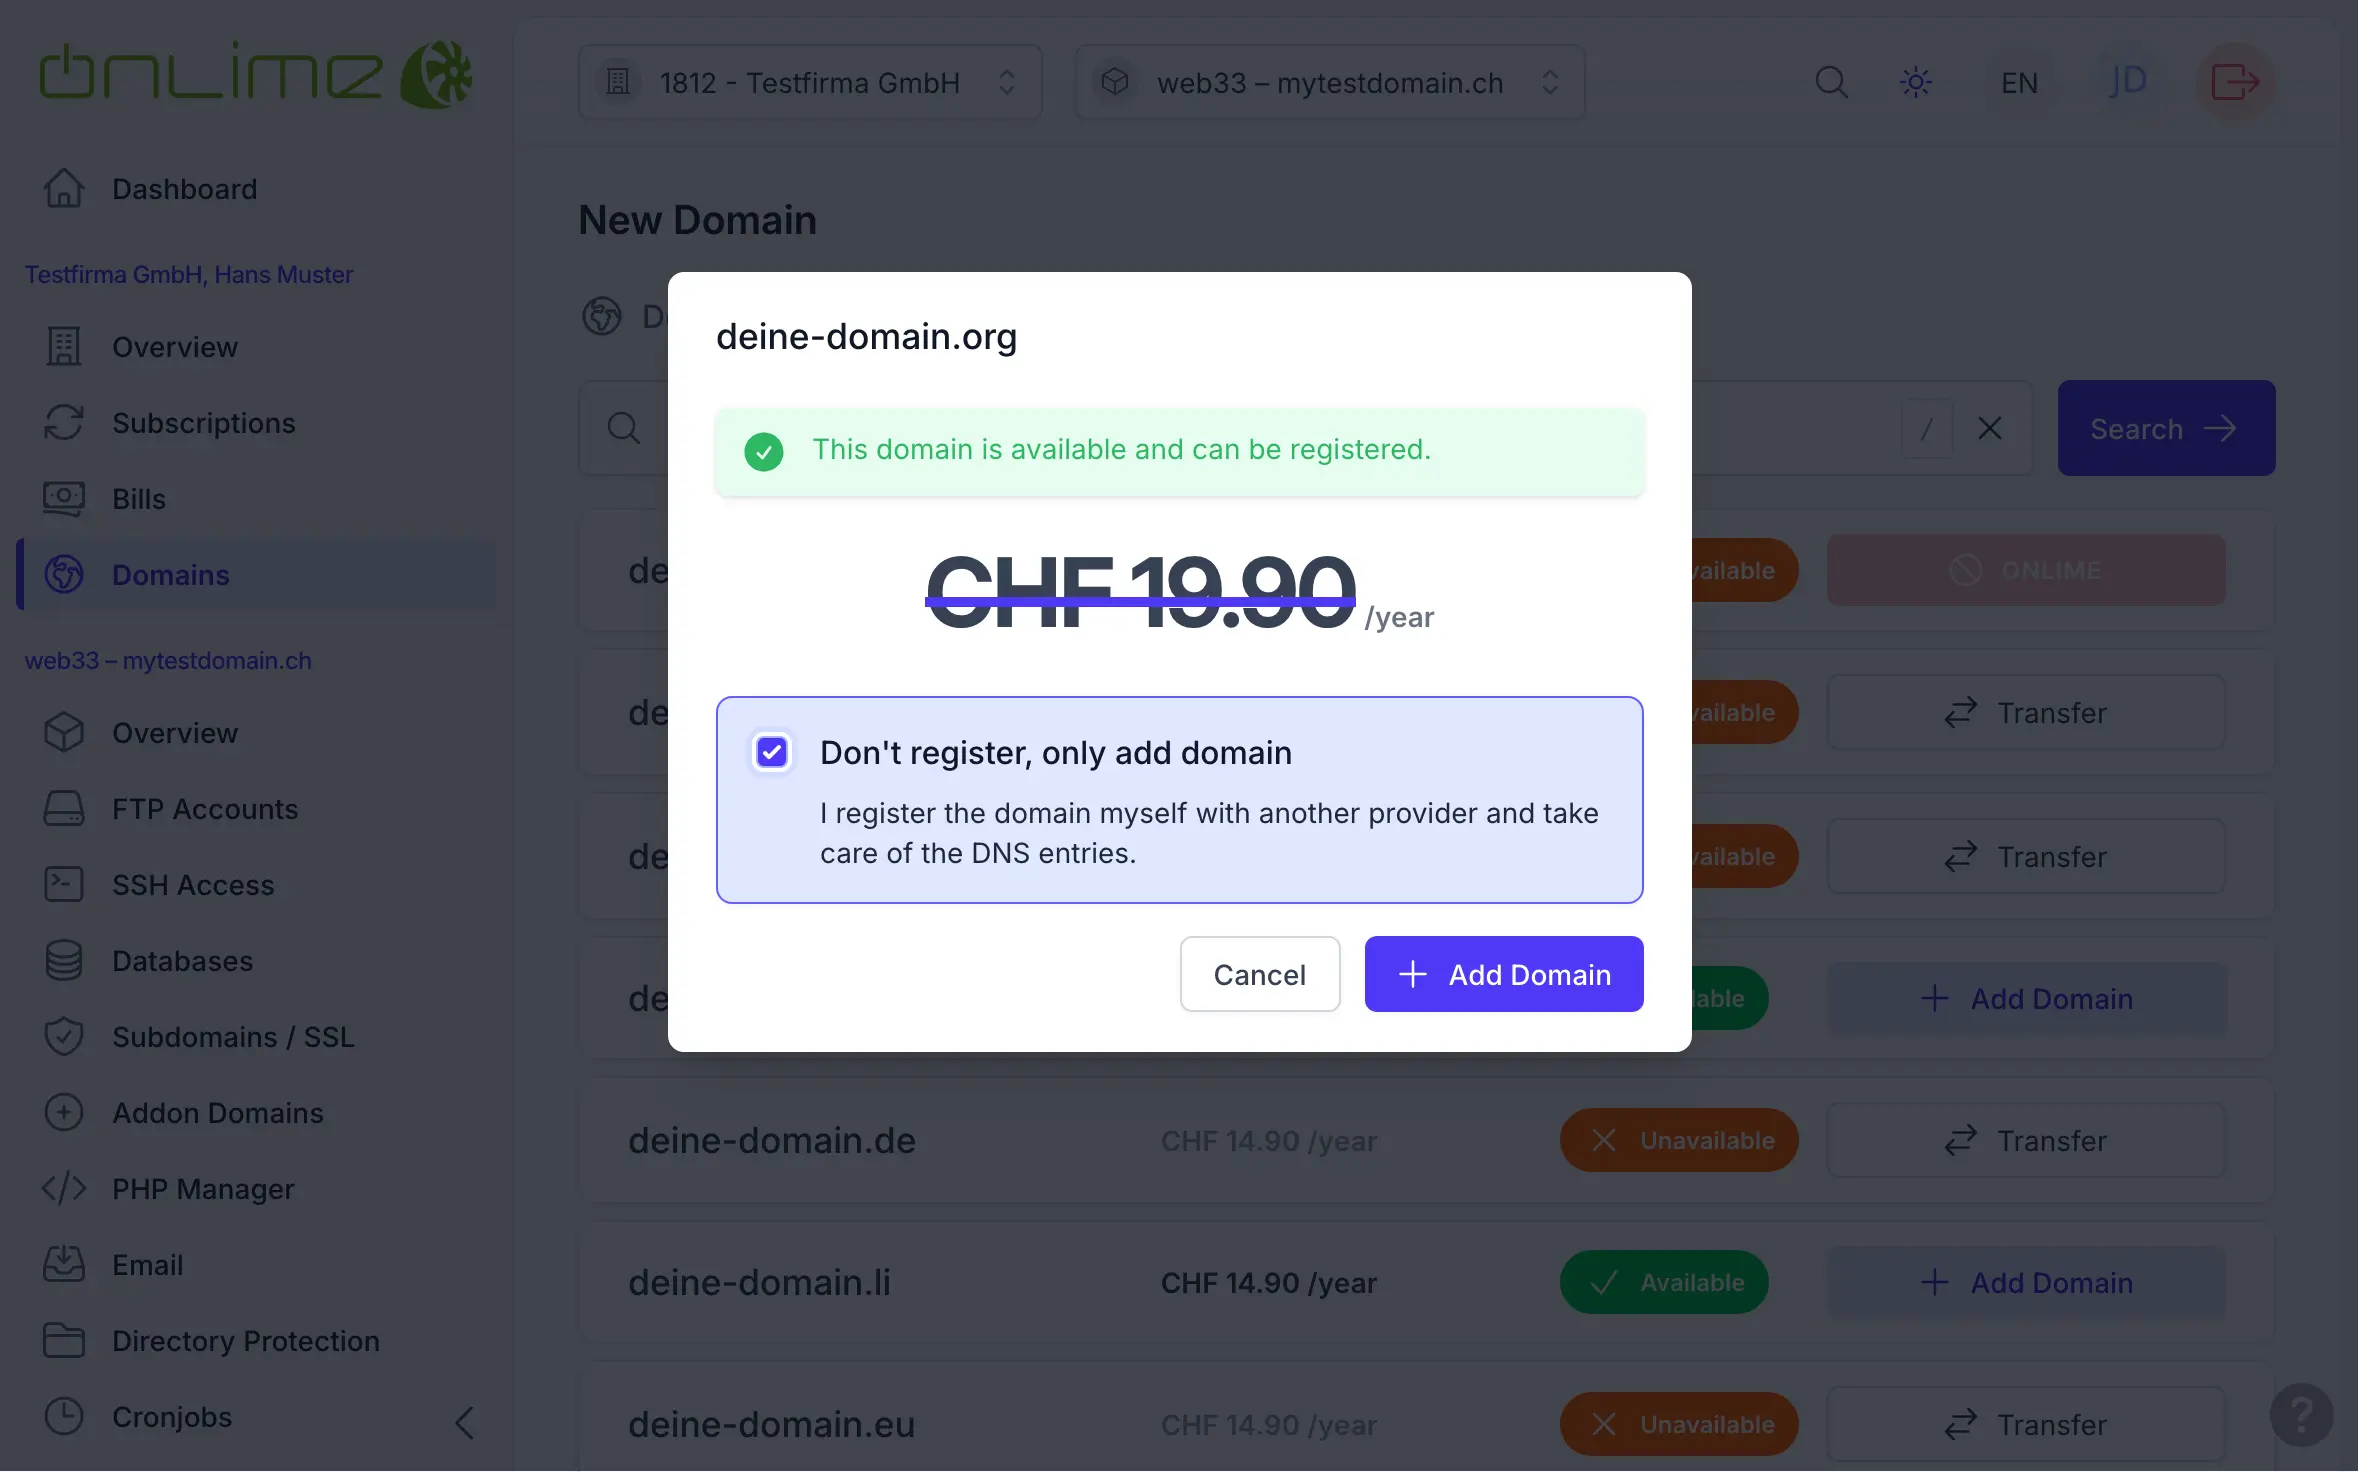
The newly added domain now appears in the domain overview. Using the , you can register or transfer the domain through us at any time, if you haven’t already done so.
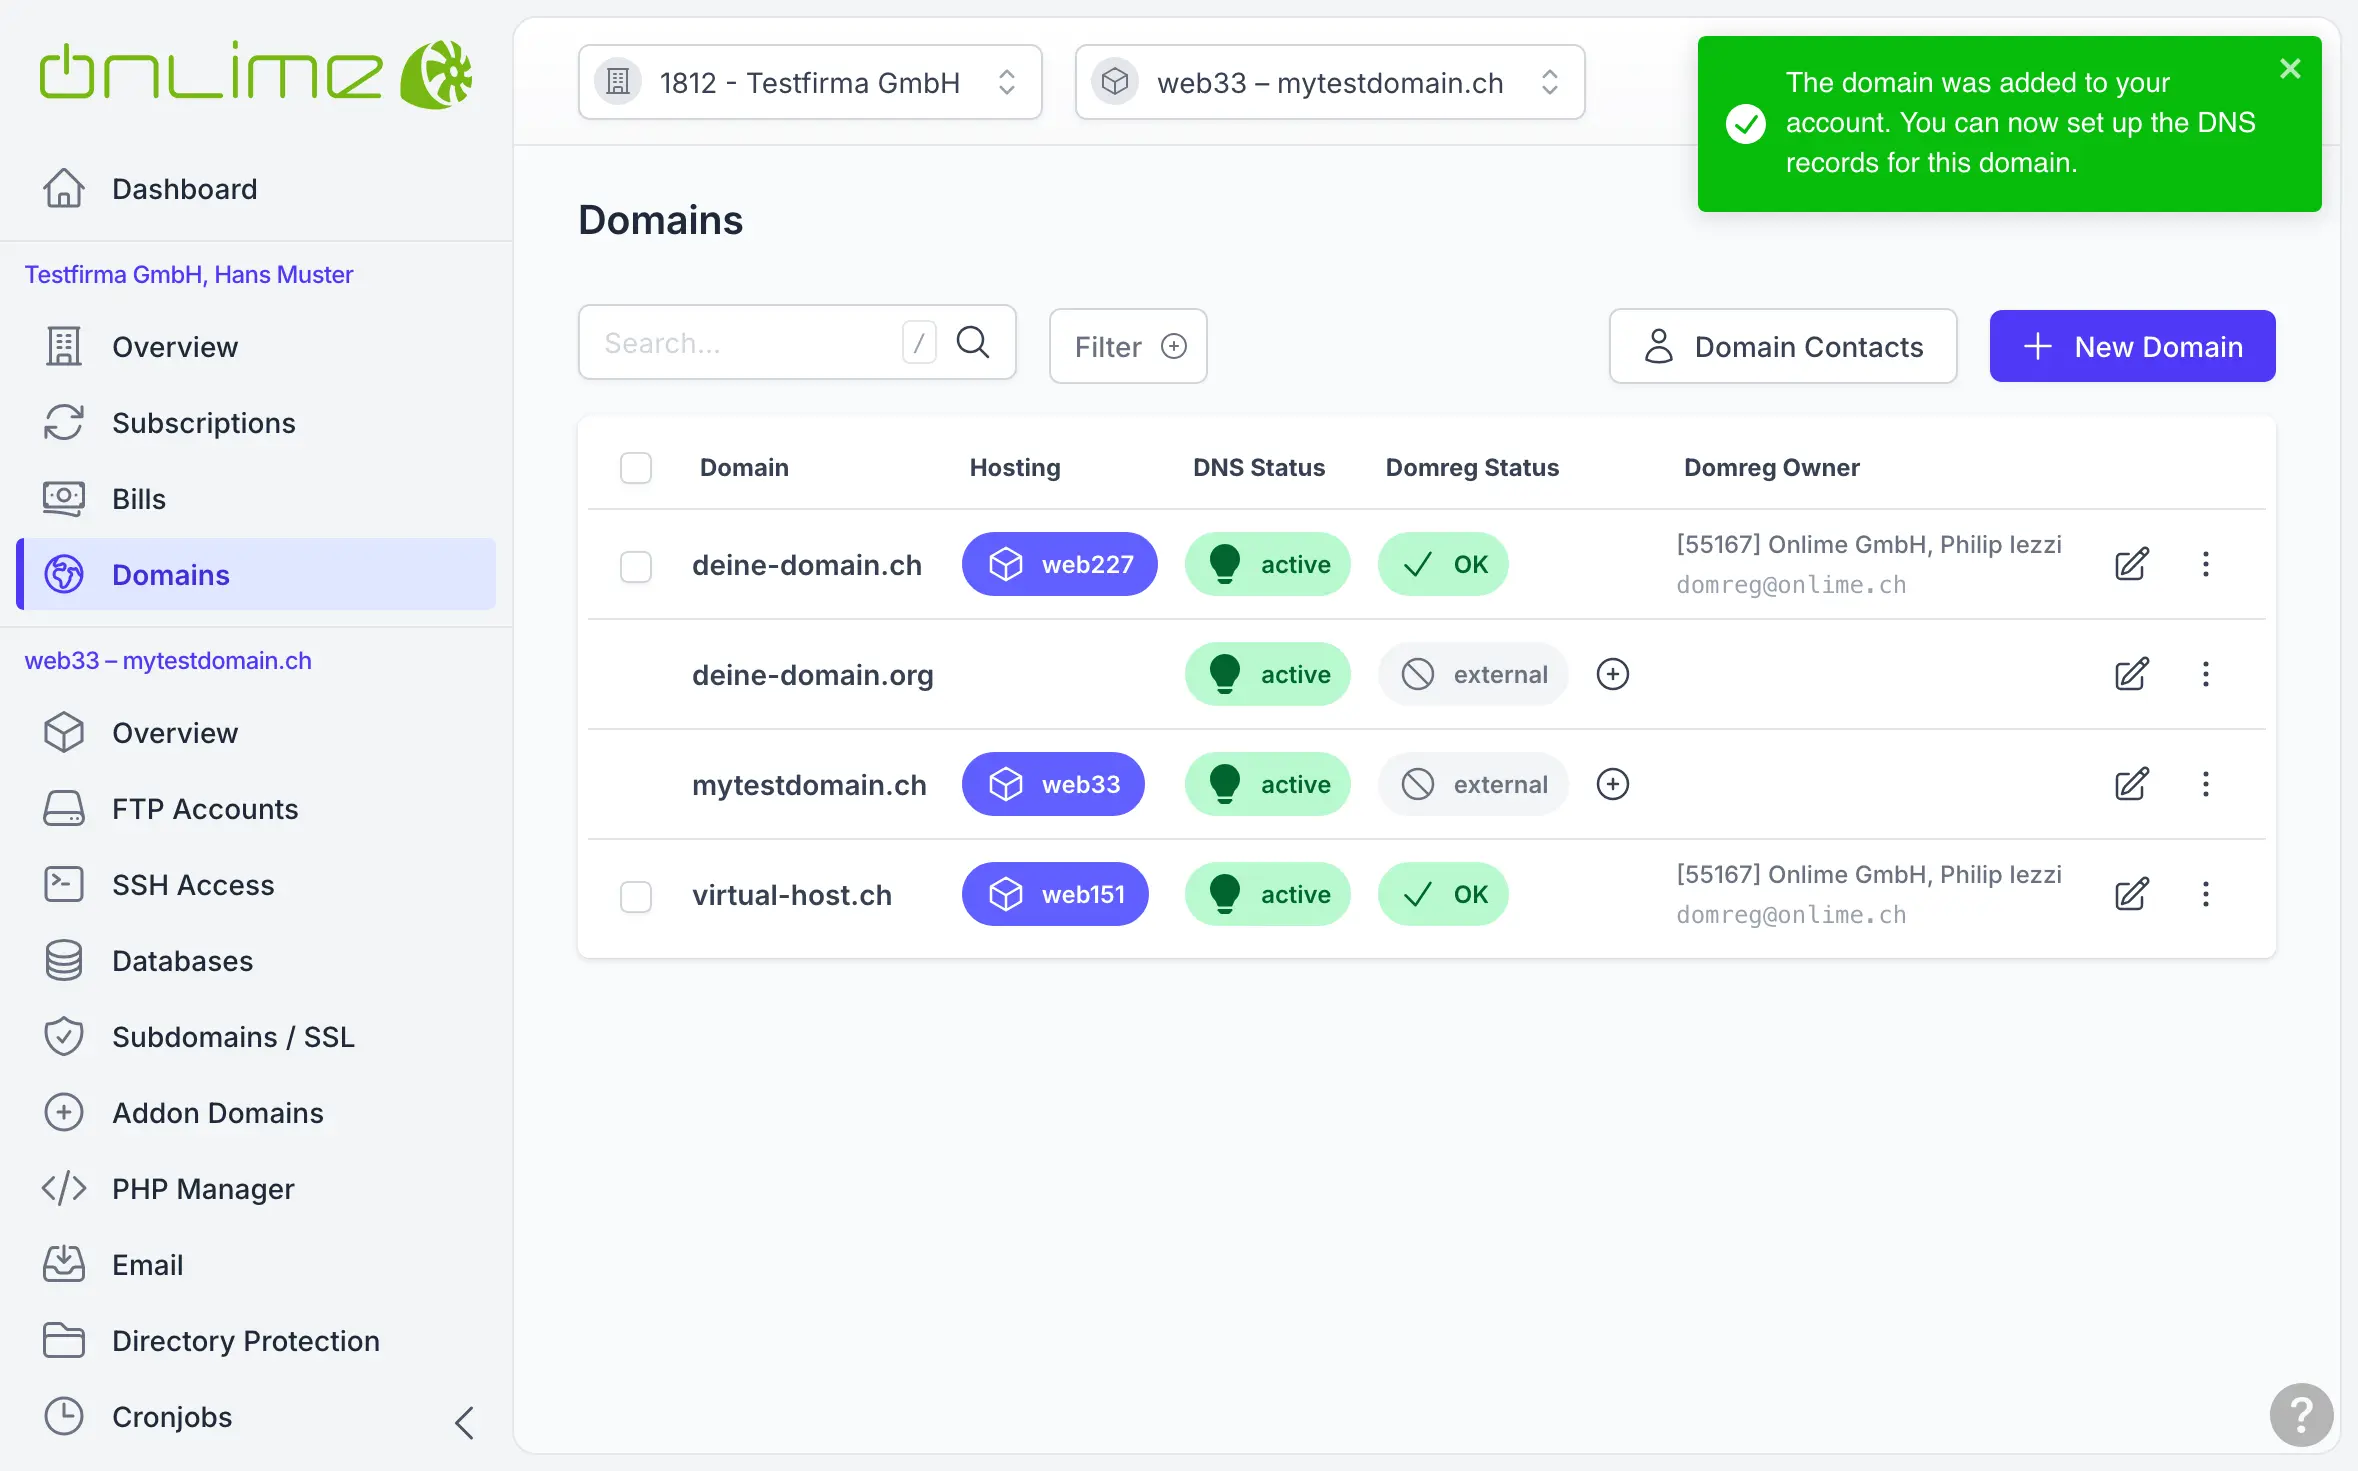
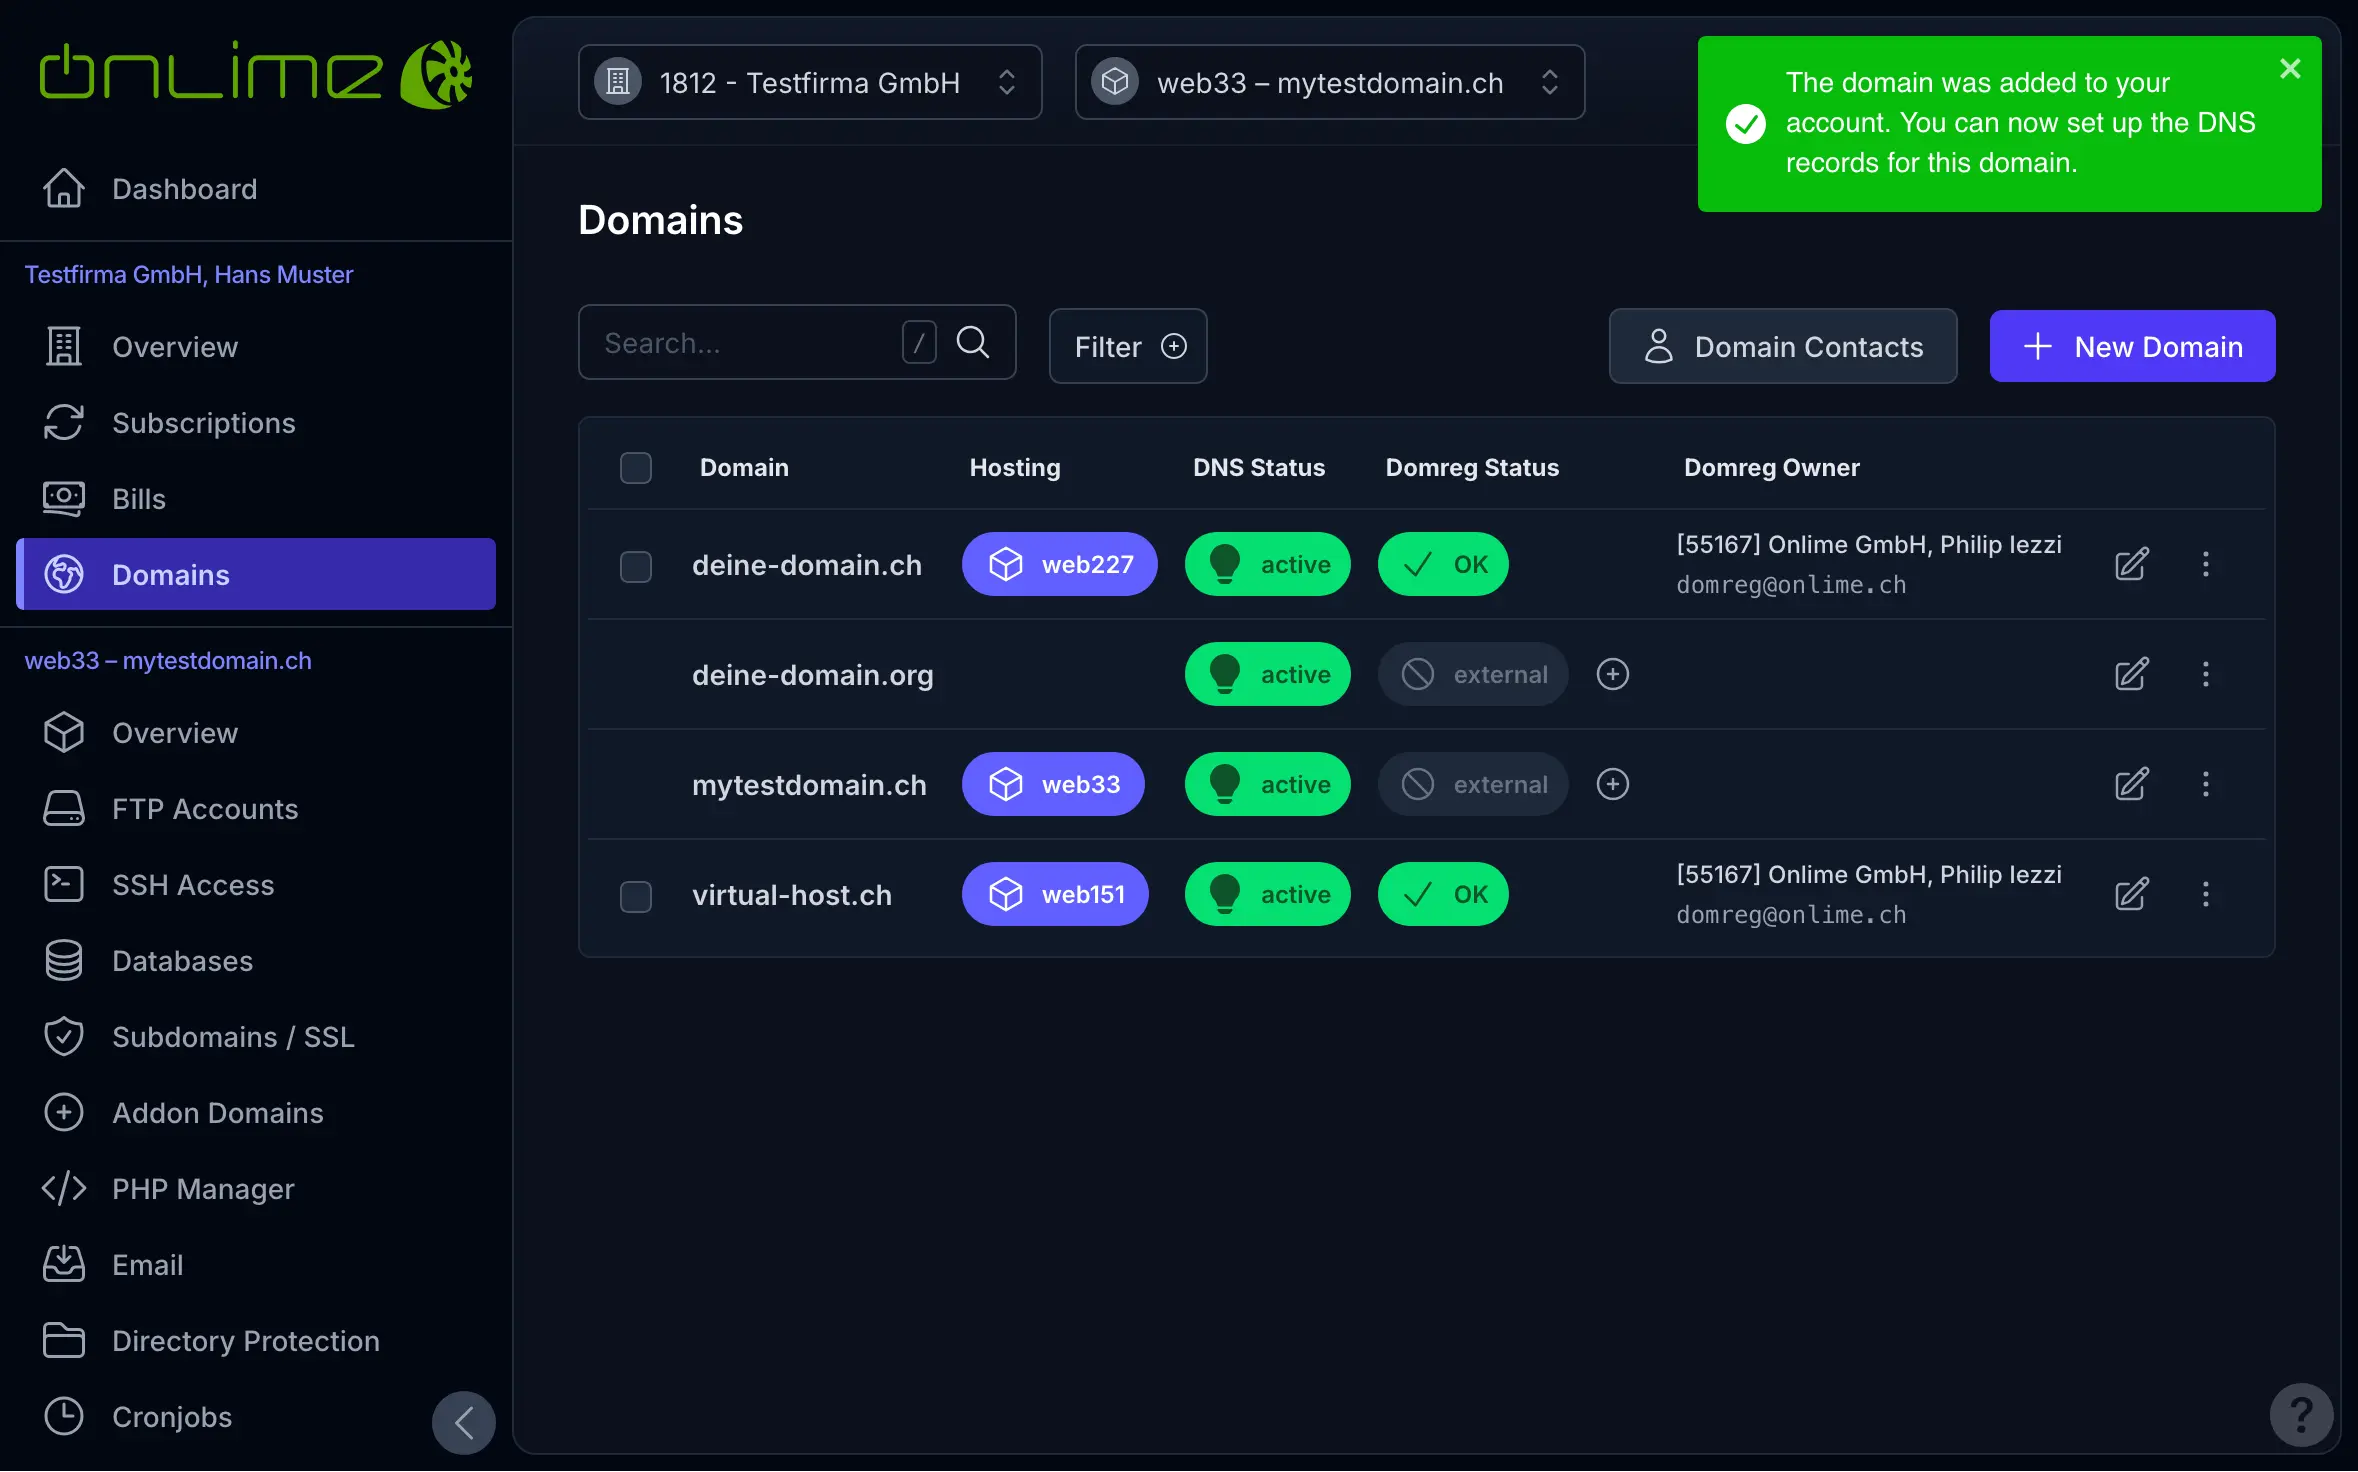
The new domain is now ready for your new hosting. To continue, go to the customer «Overview» or «Subscriptions» and click to proceed to step 3.
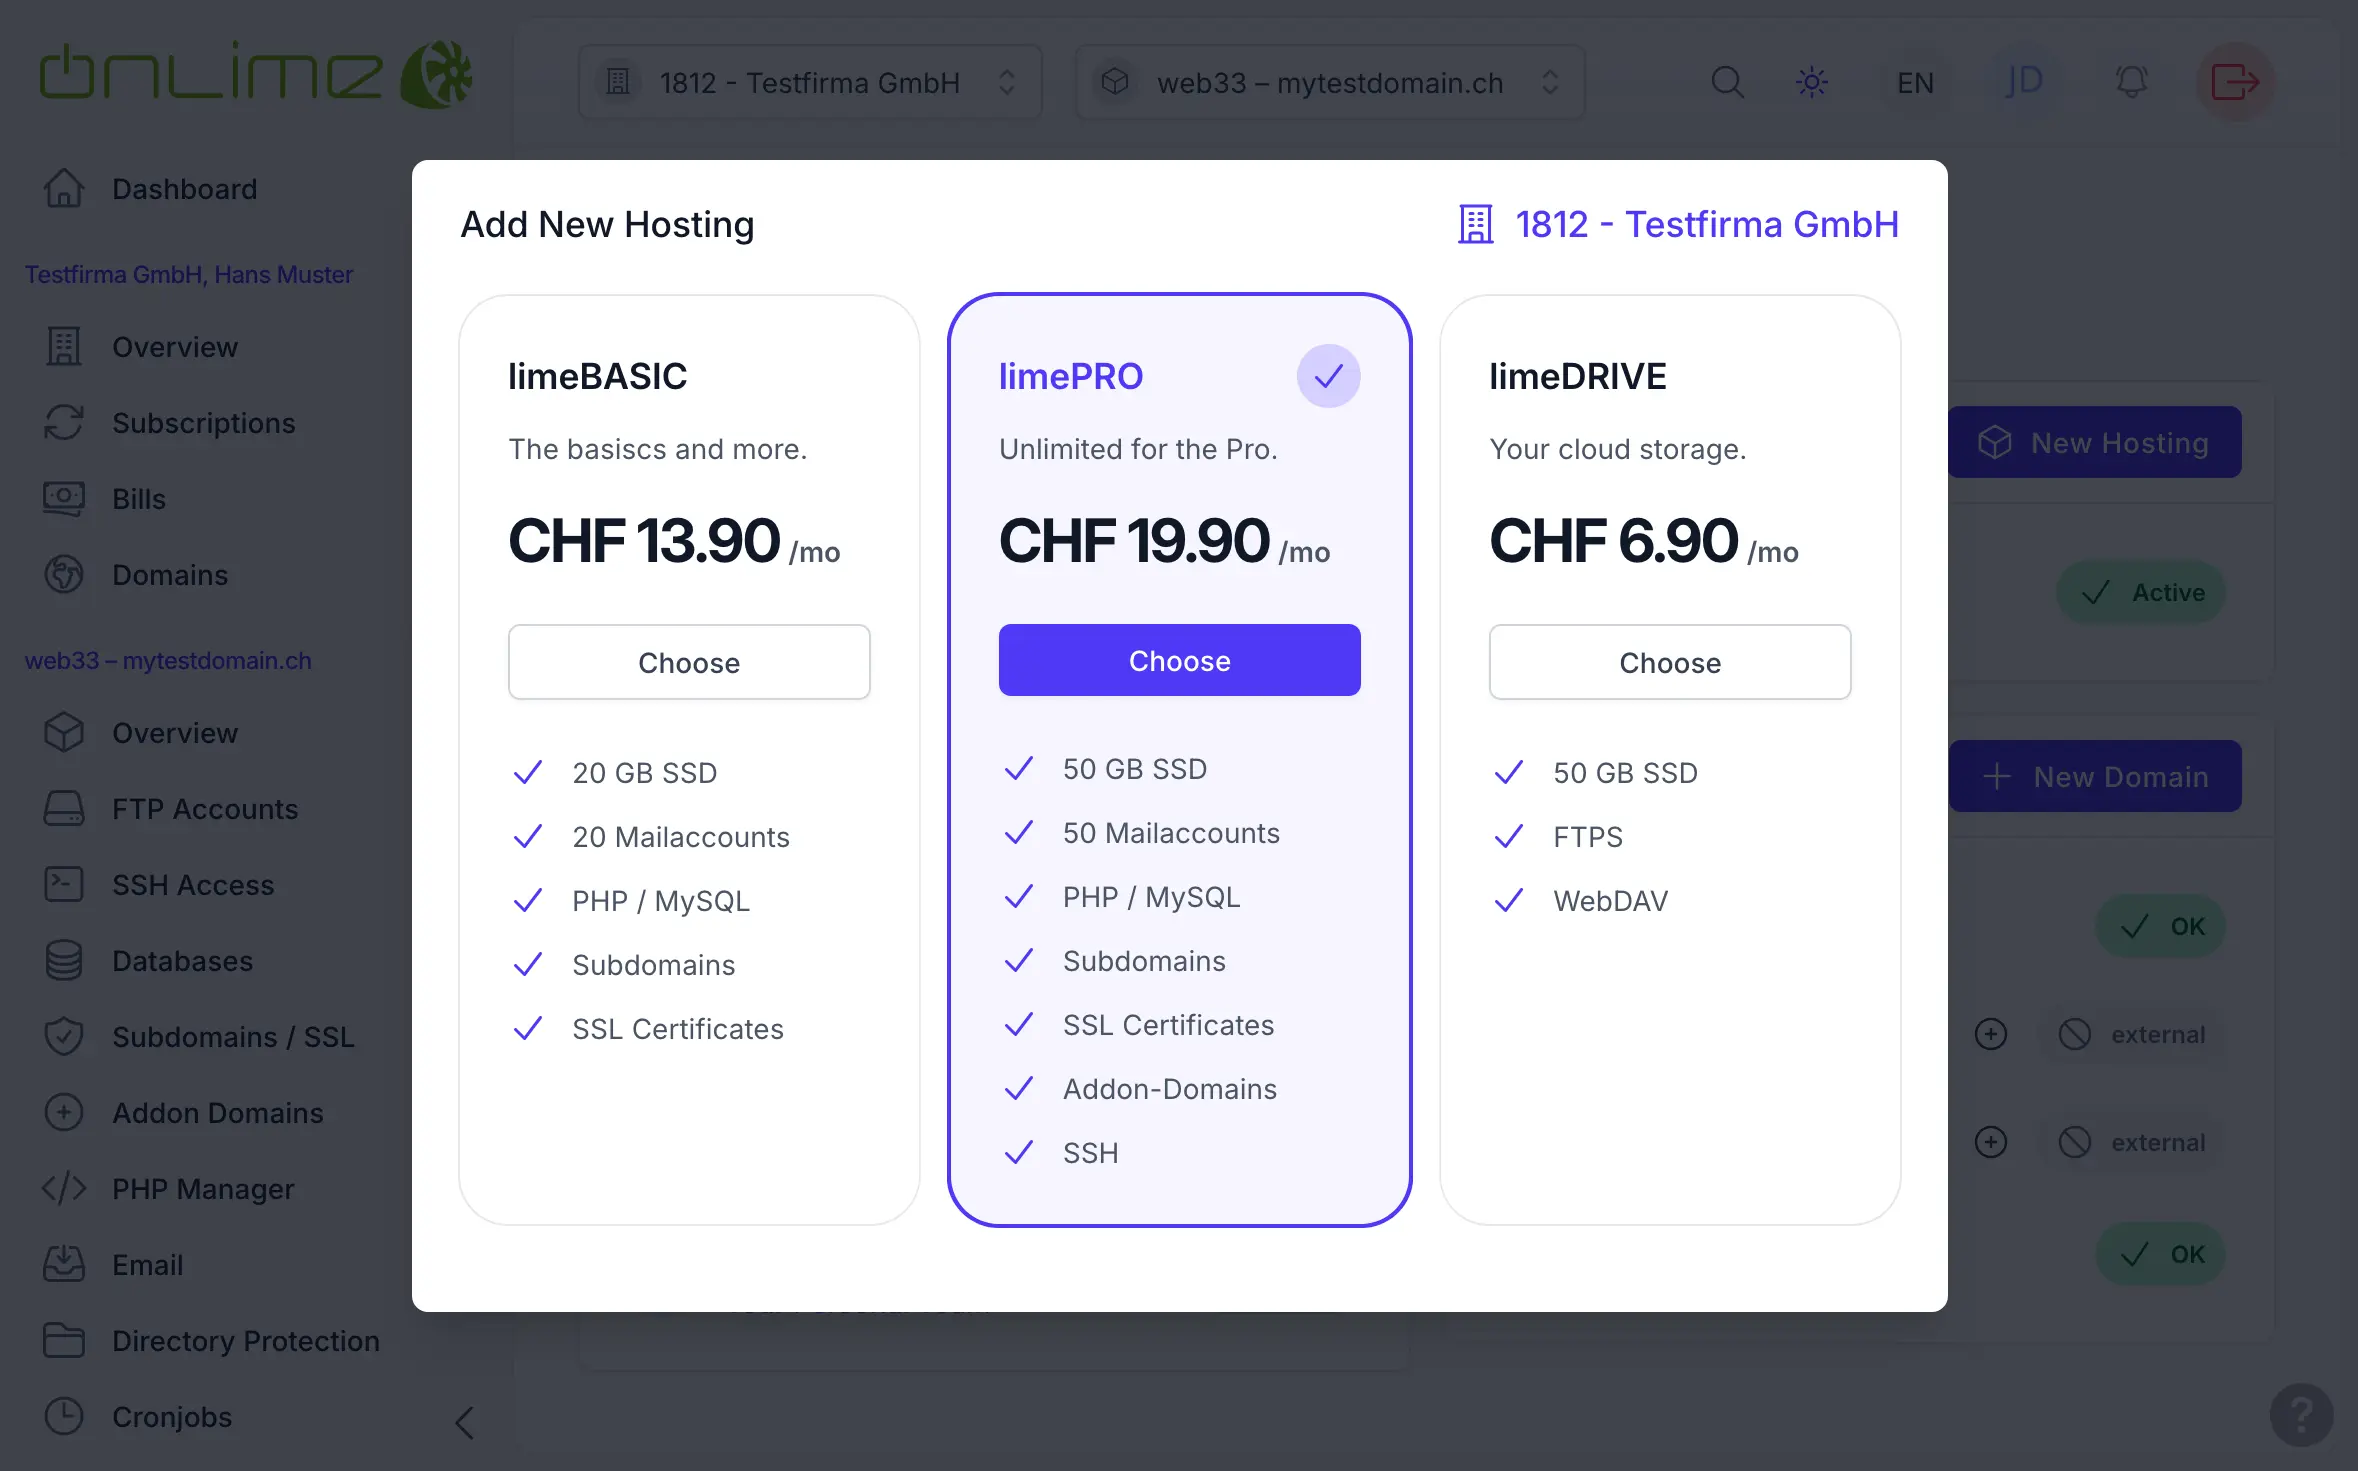
3. Create Hosting
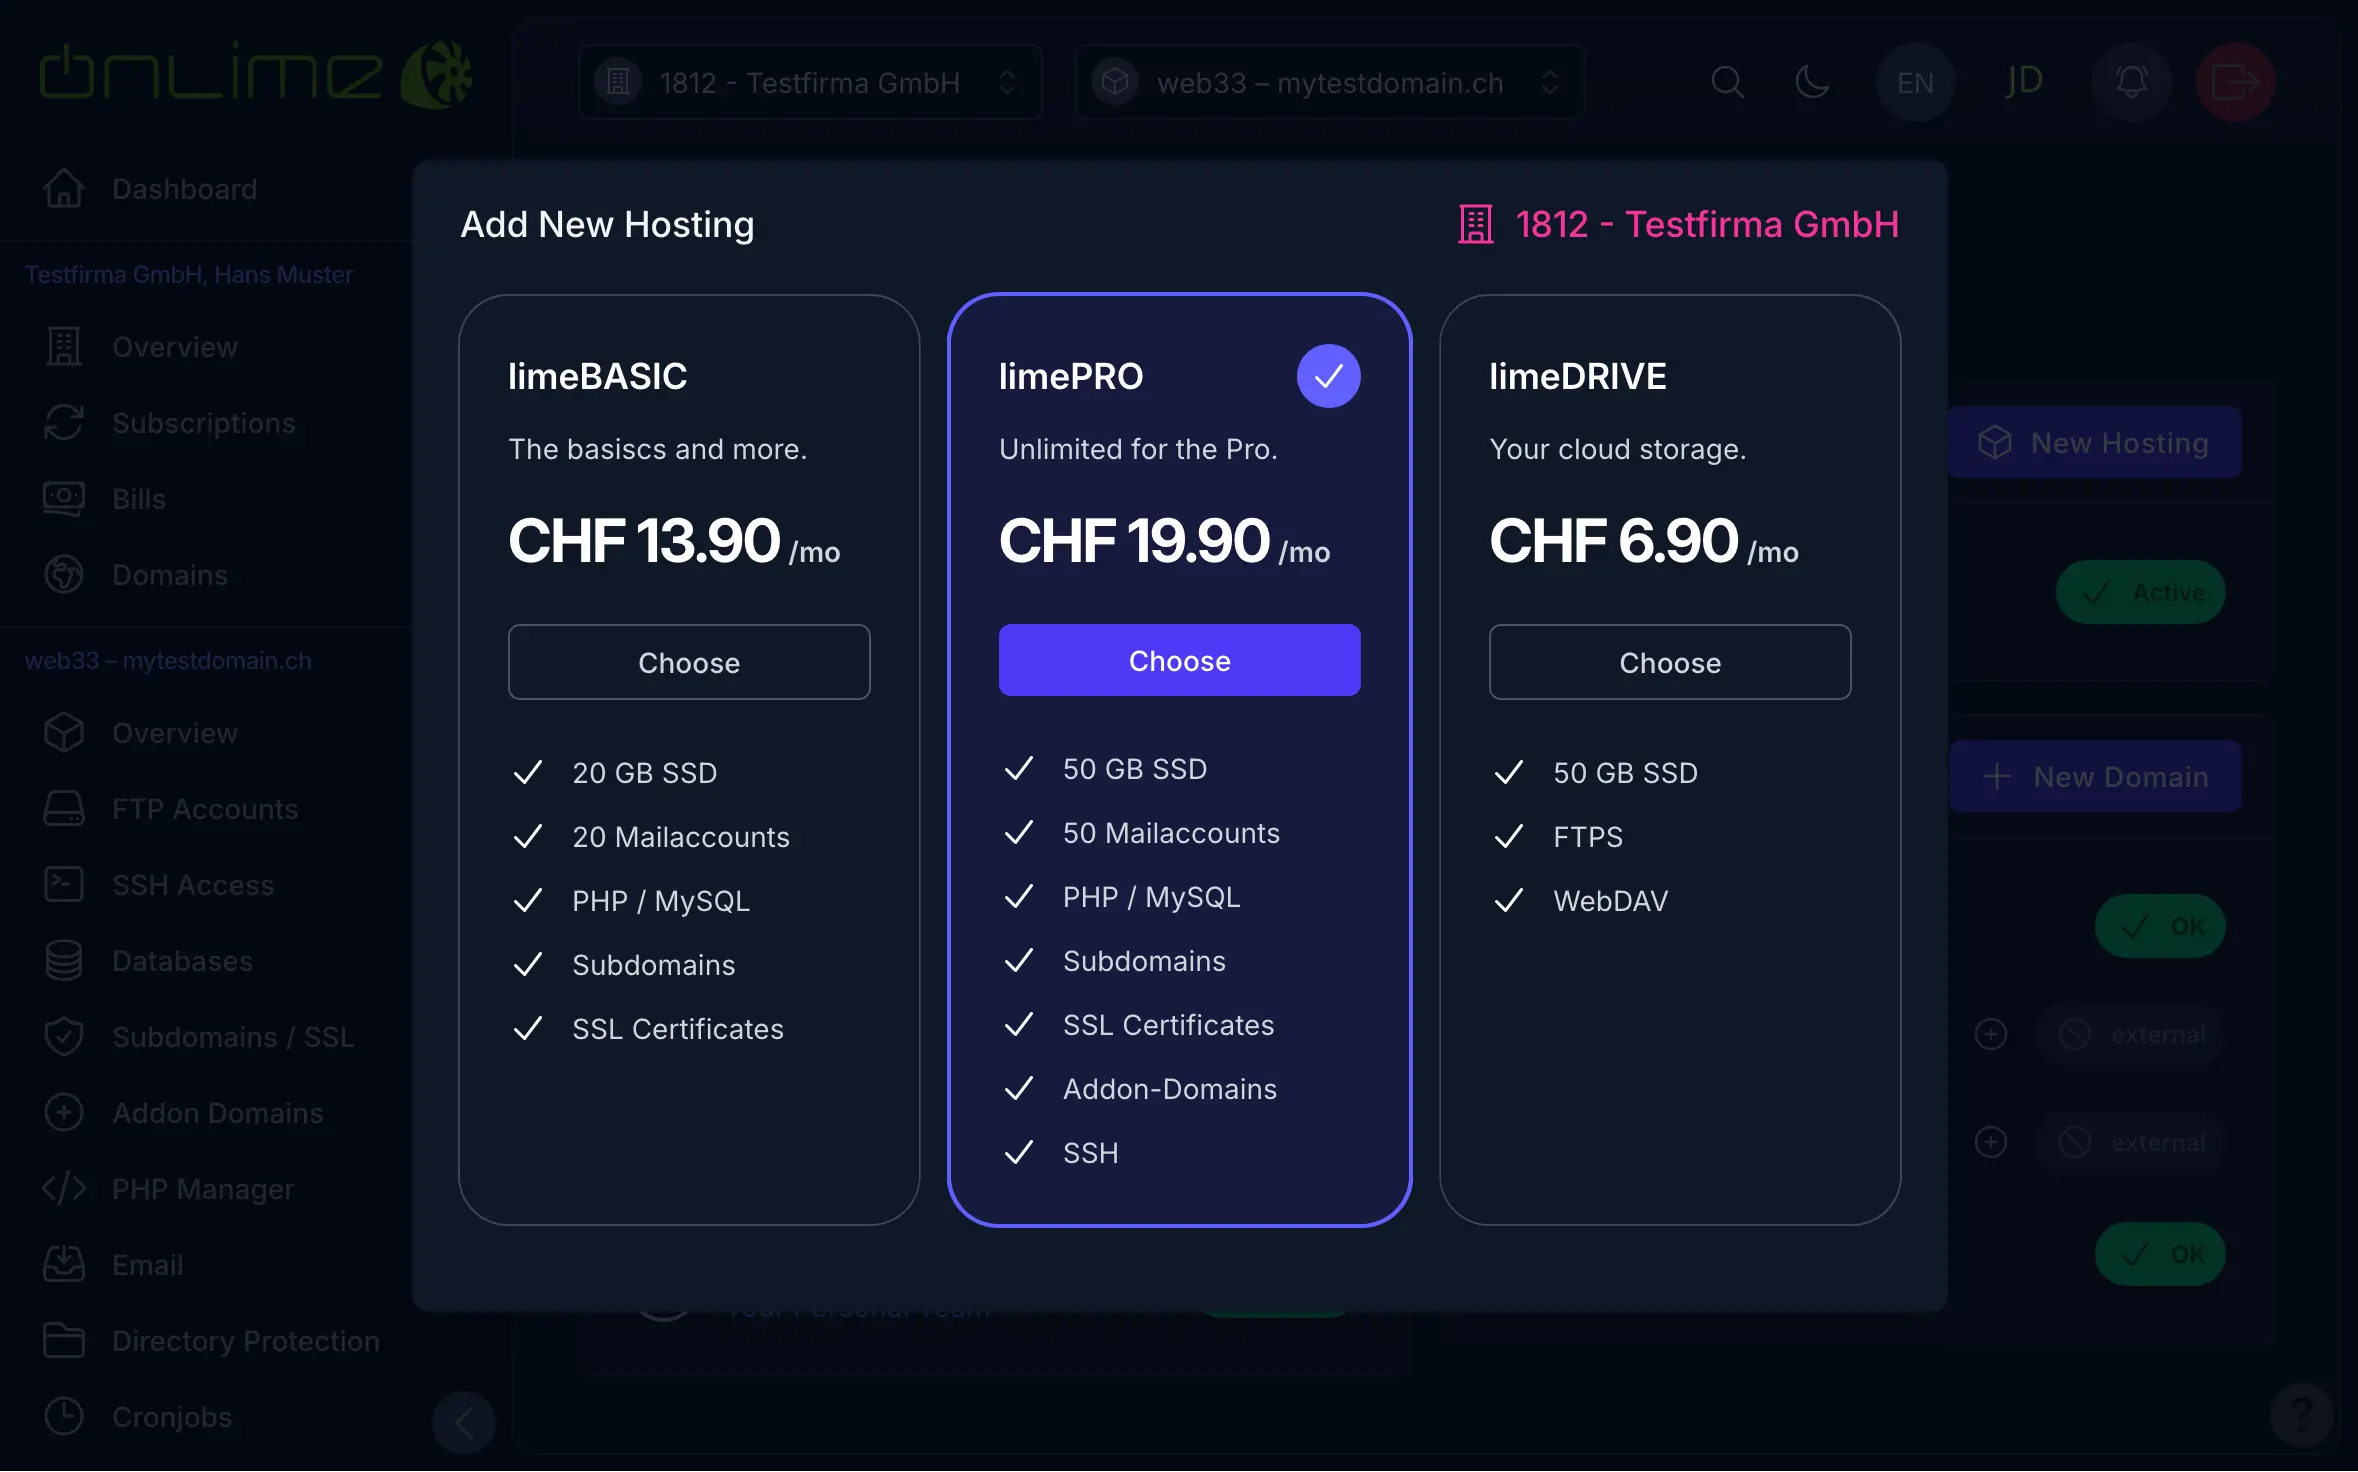
First, select your hosting package:
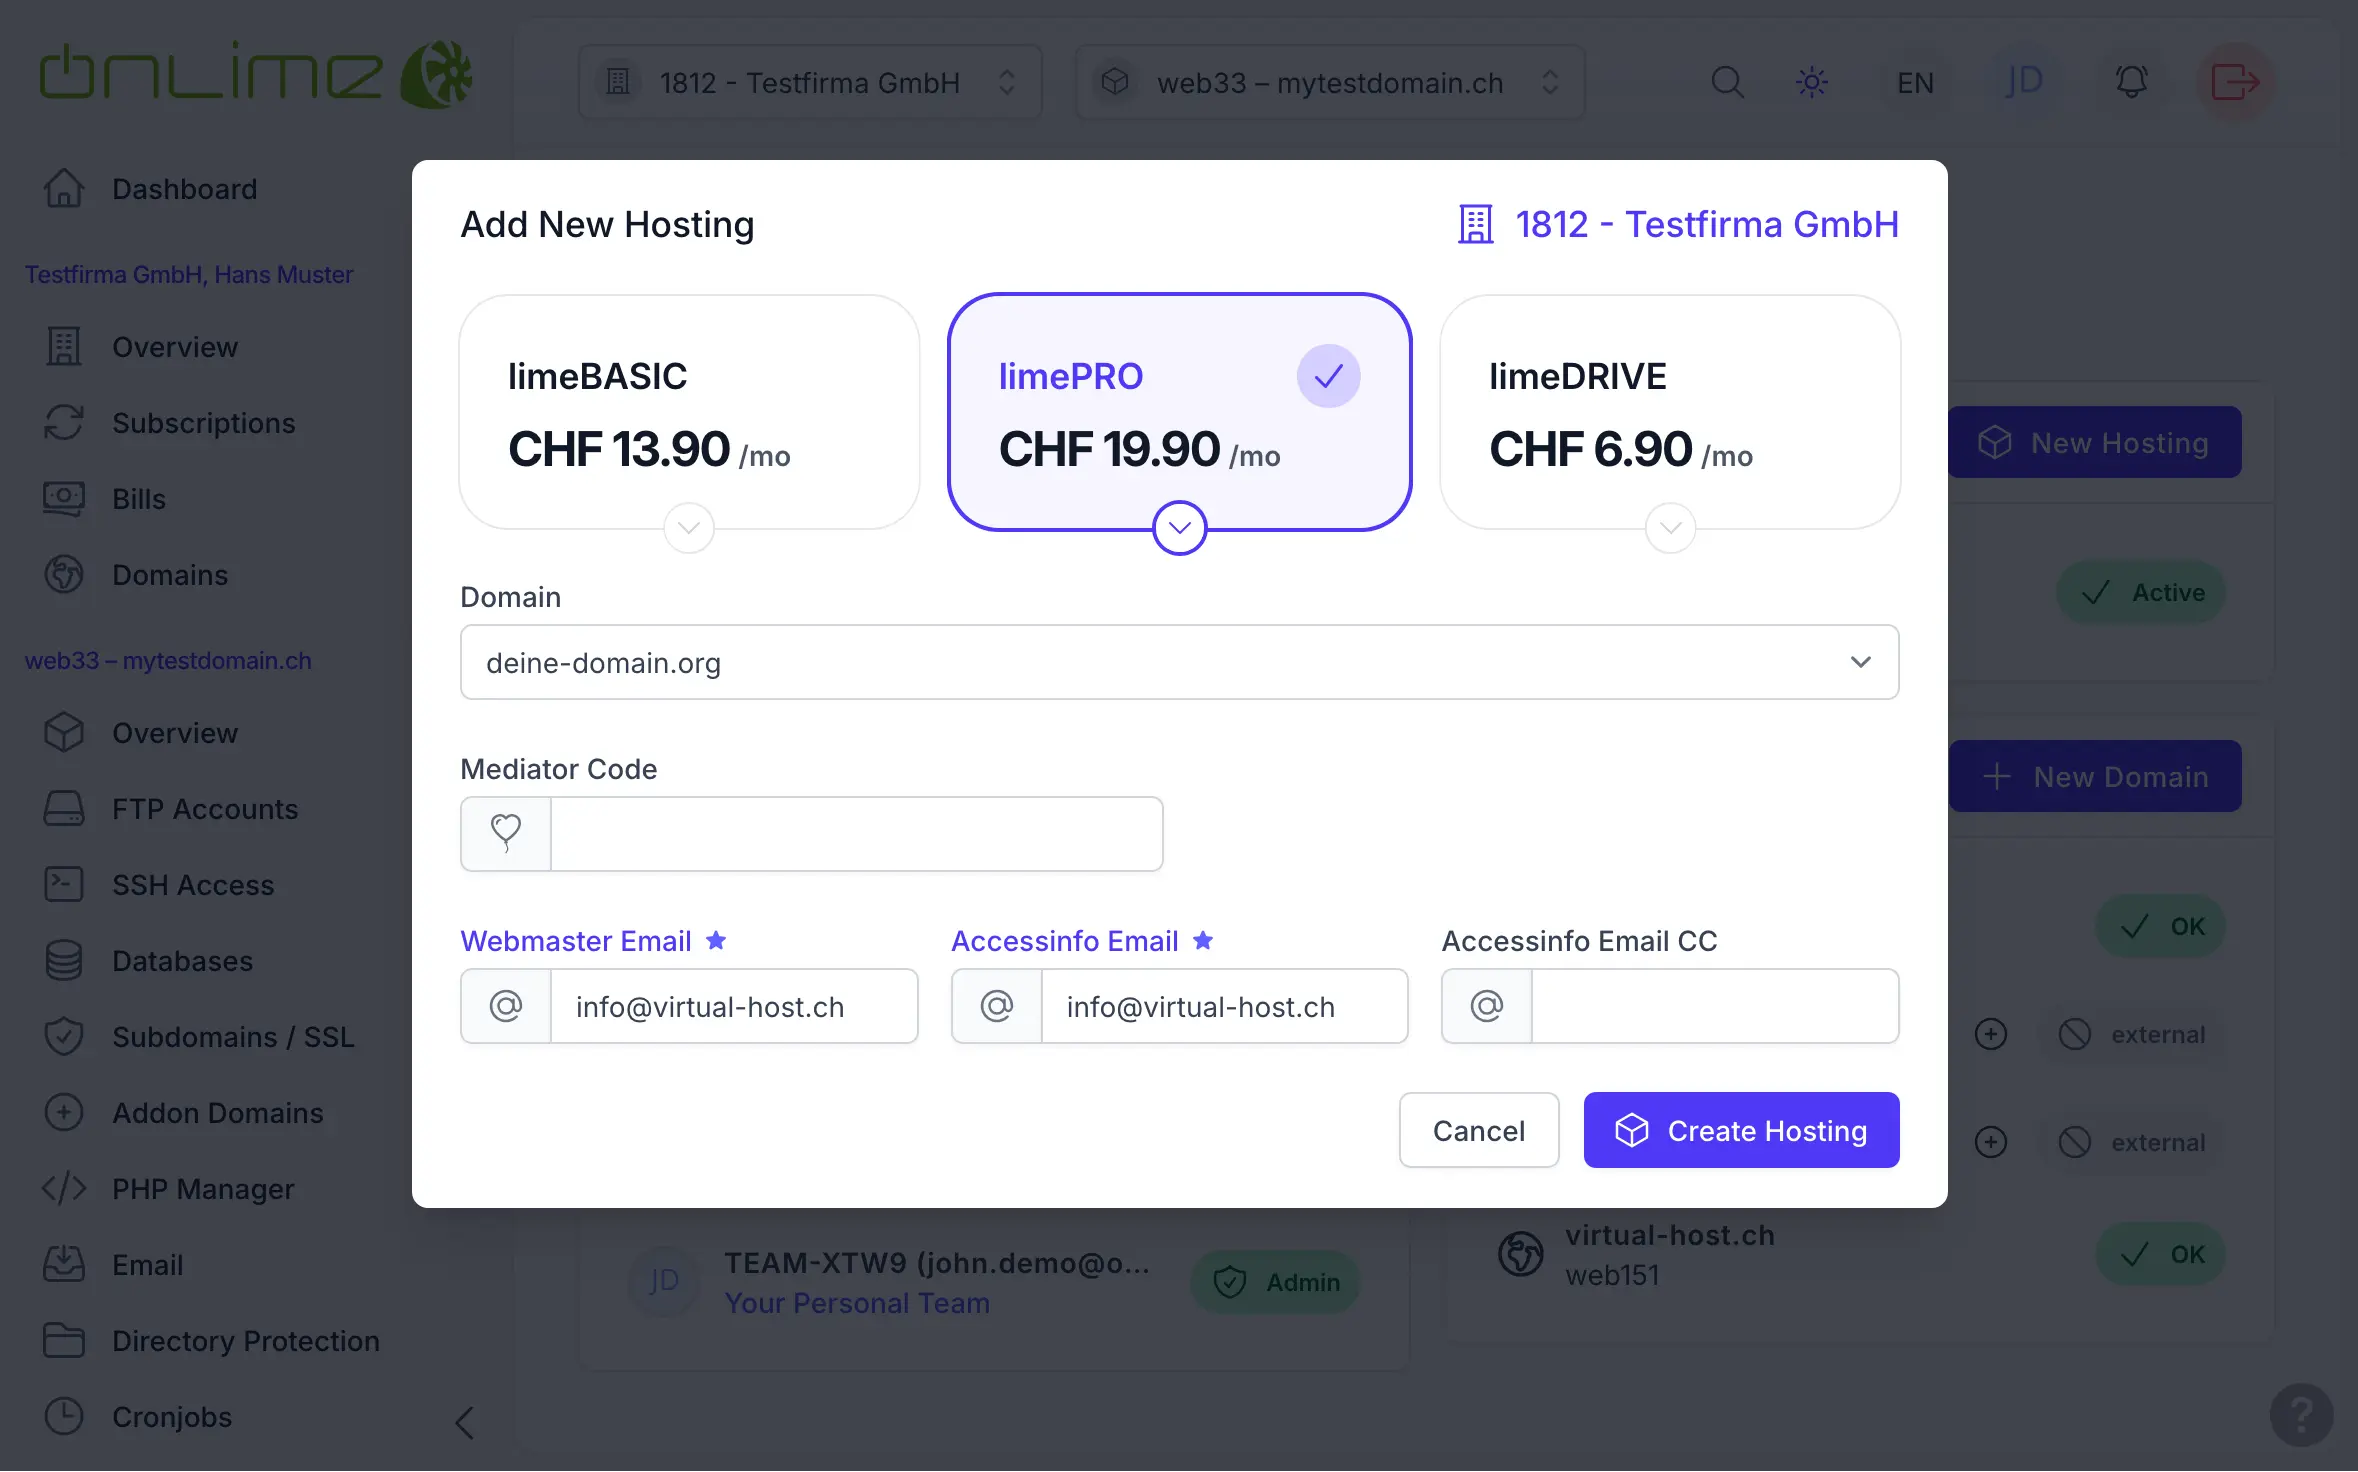
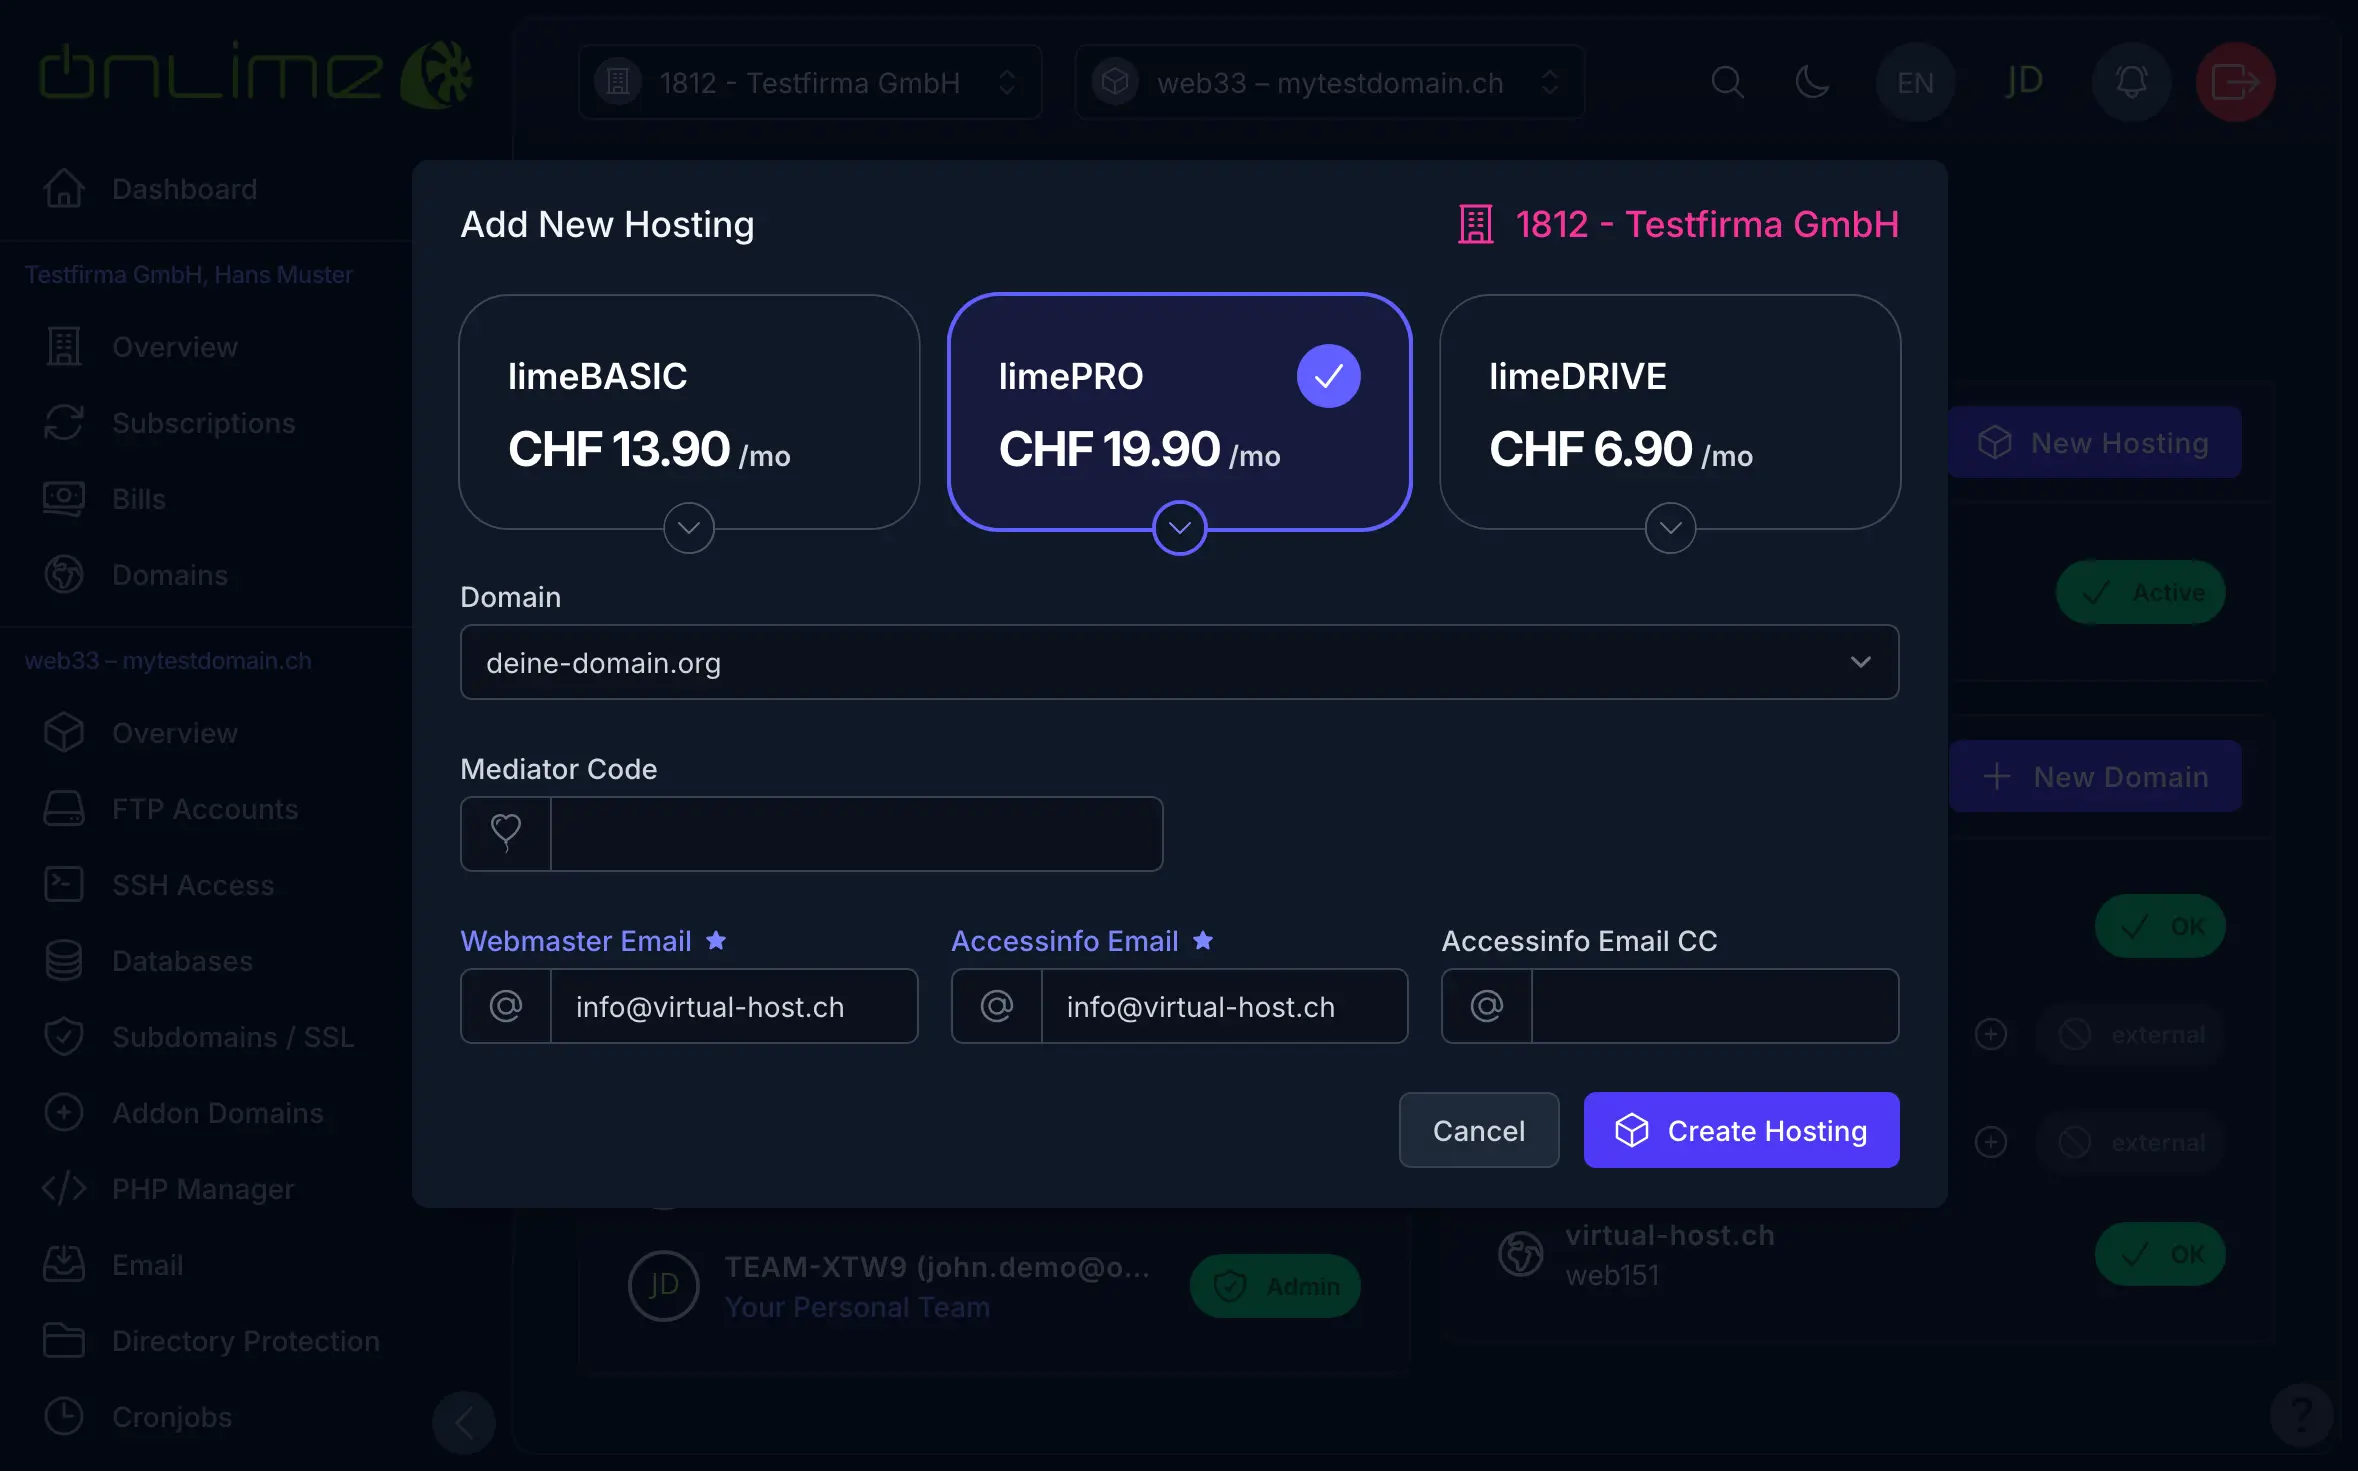
The Accessinfo email is sent only to the listed email address and contains only the password for the primary FTPS account. Otherwise, you already have access to the newly created hosting through your control panel login.
Click to process the order.
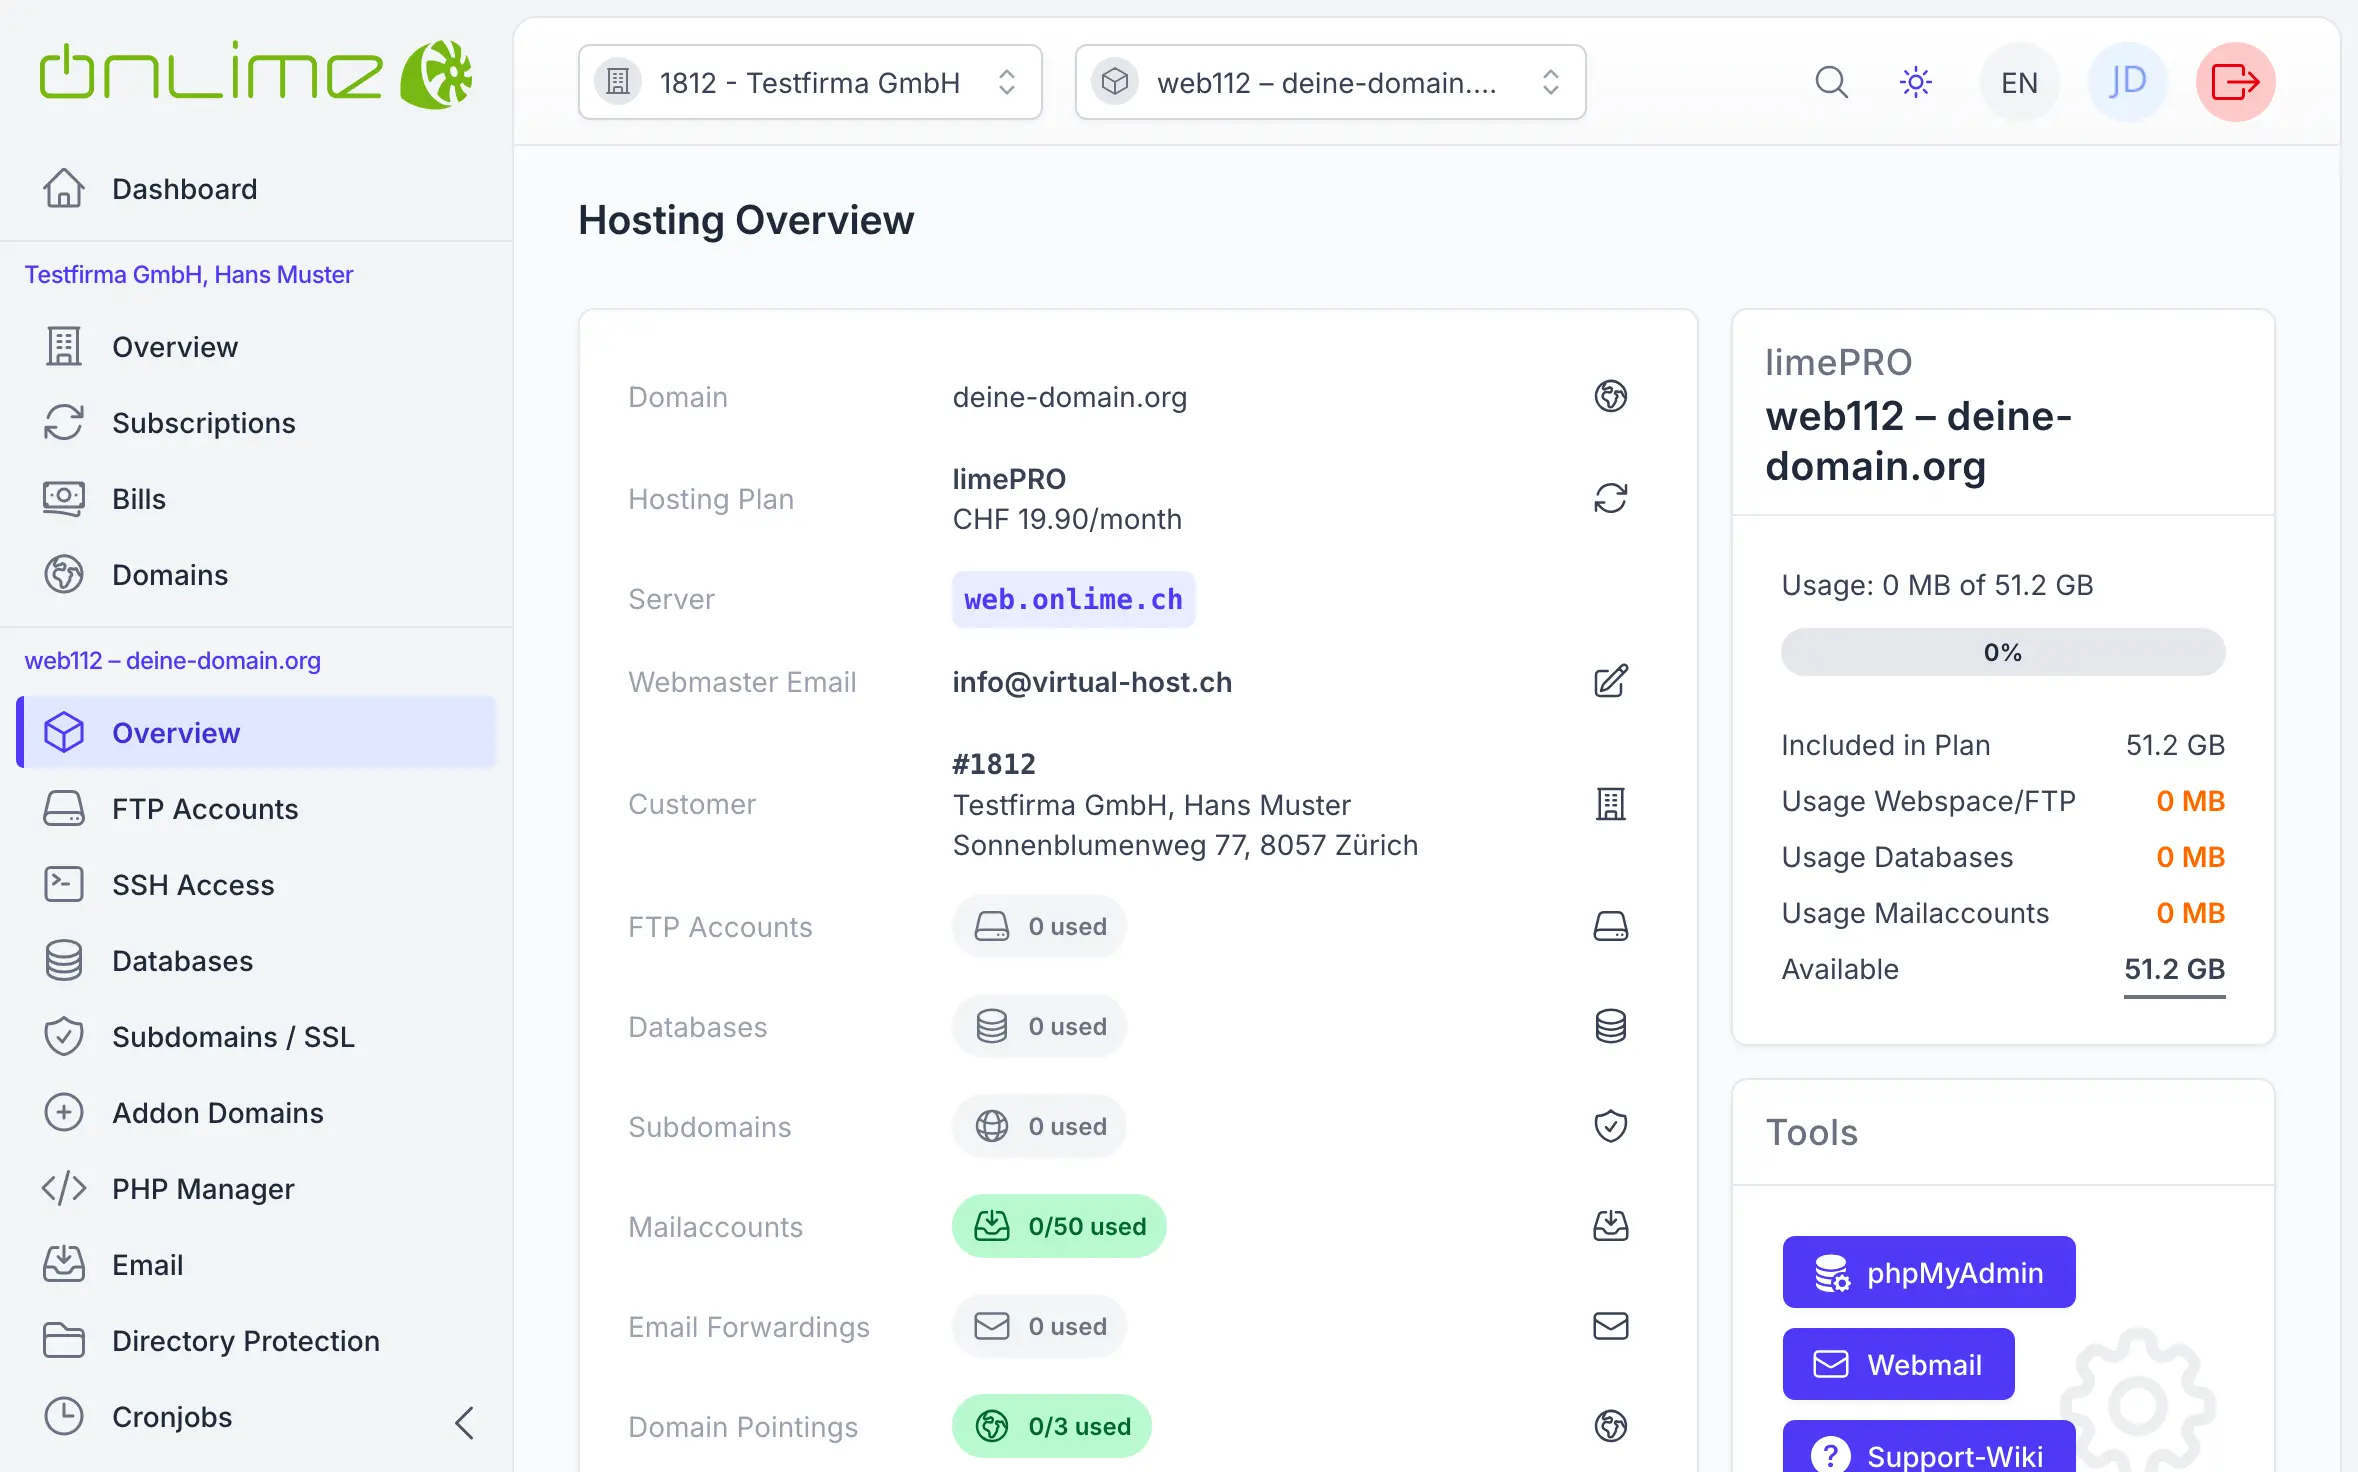
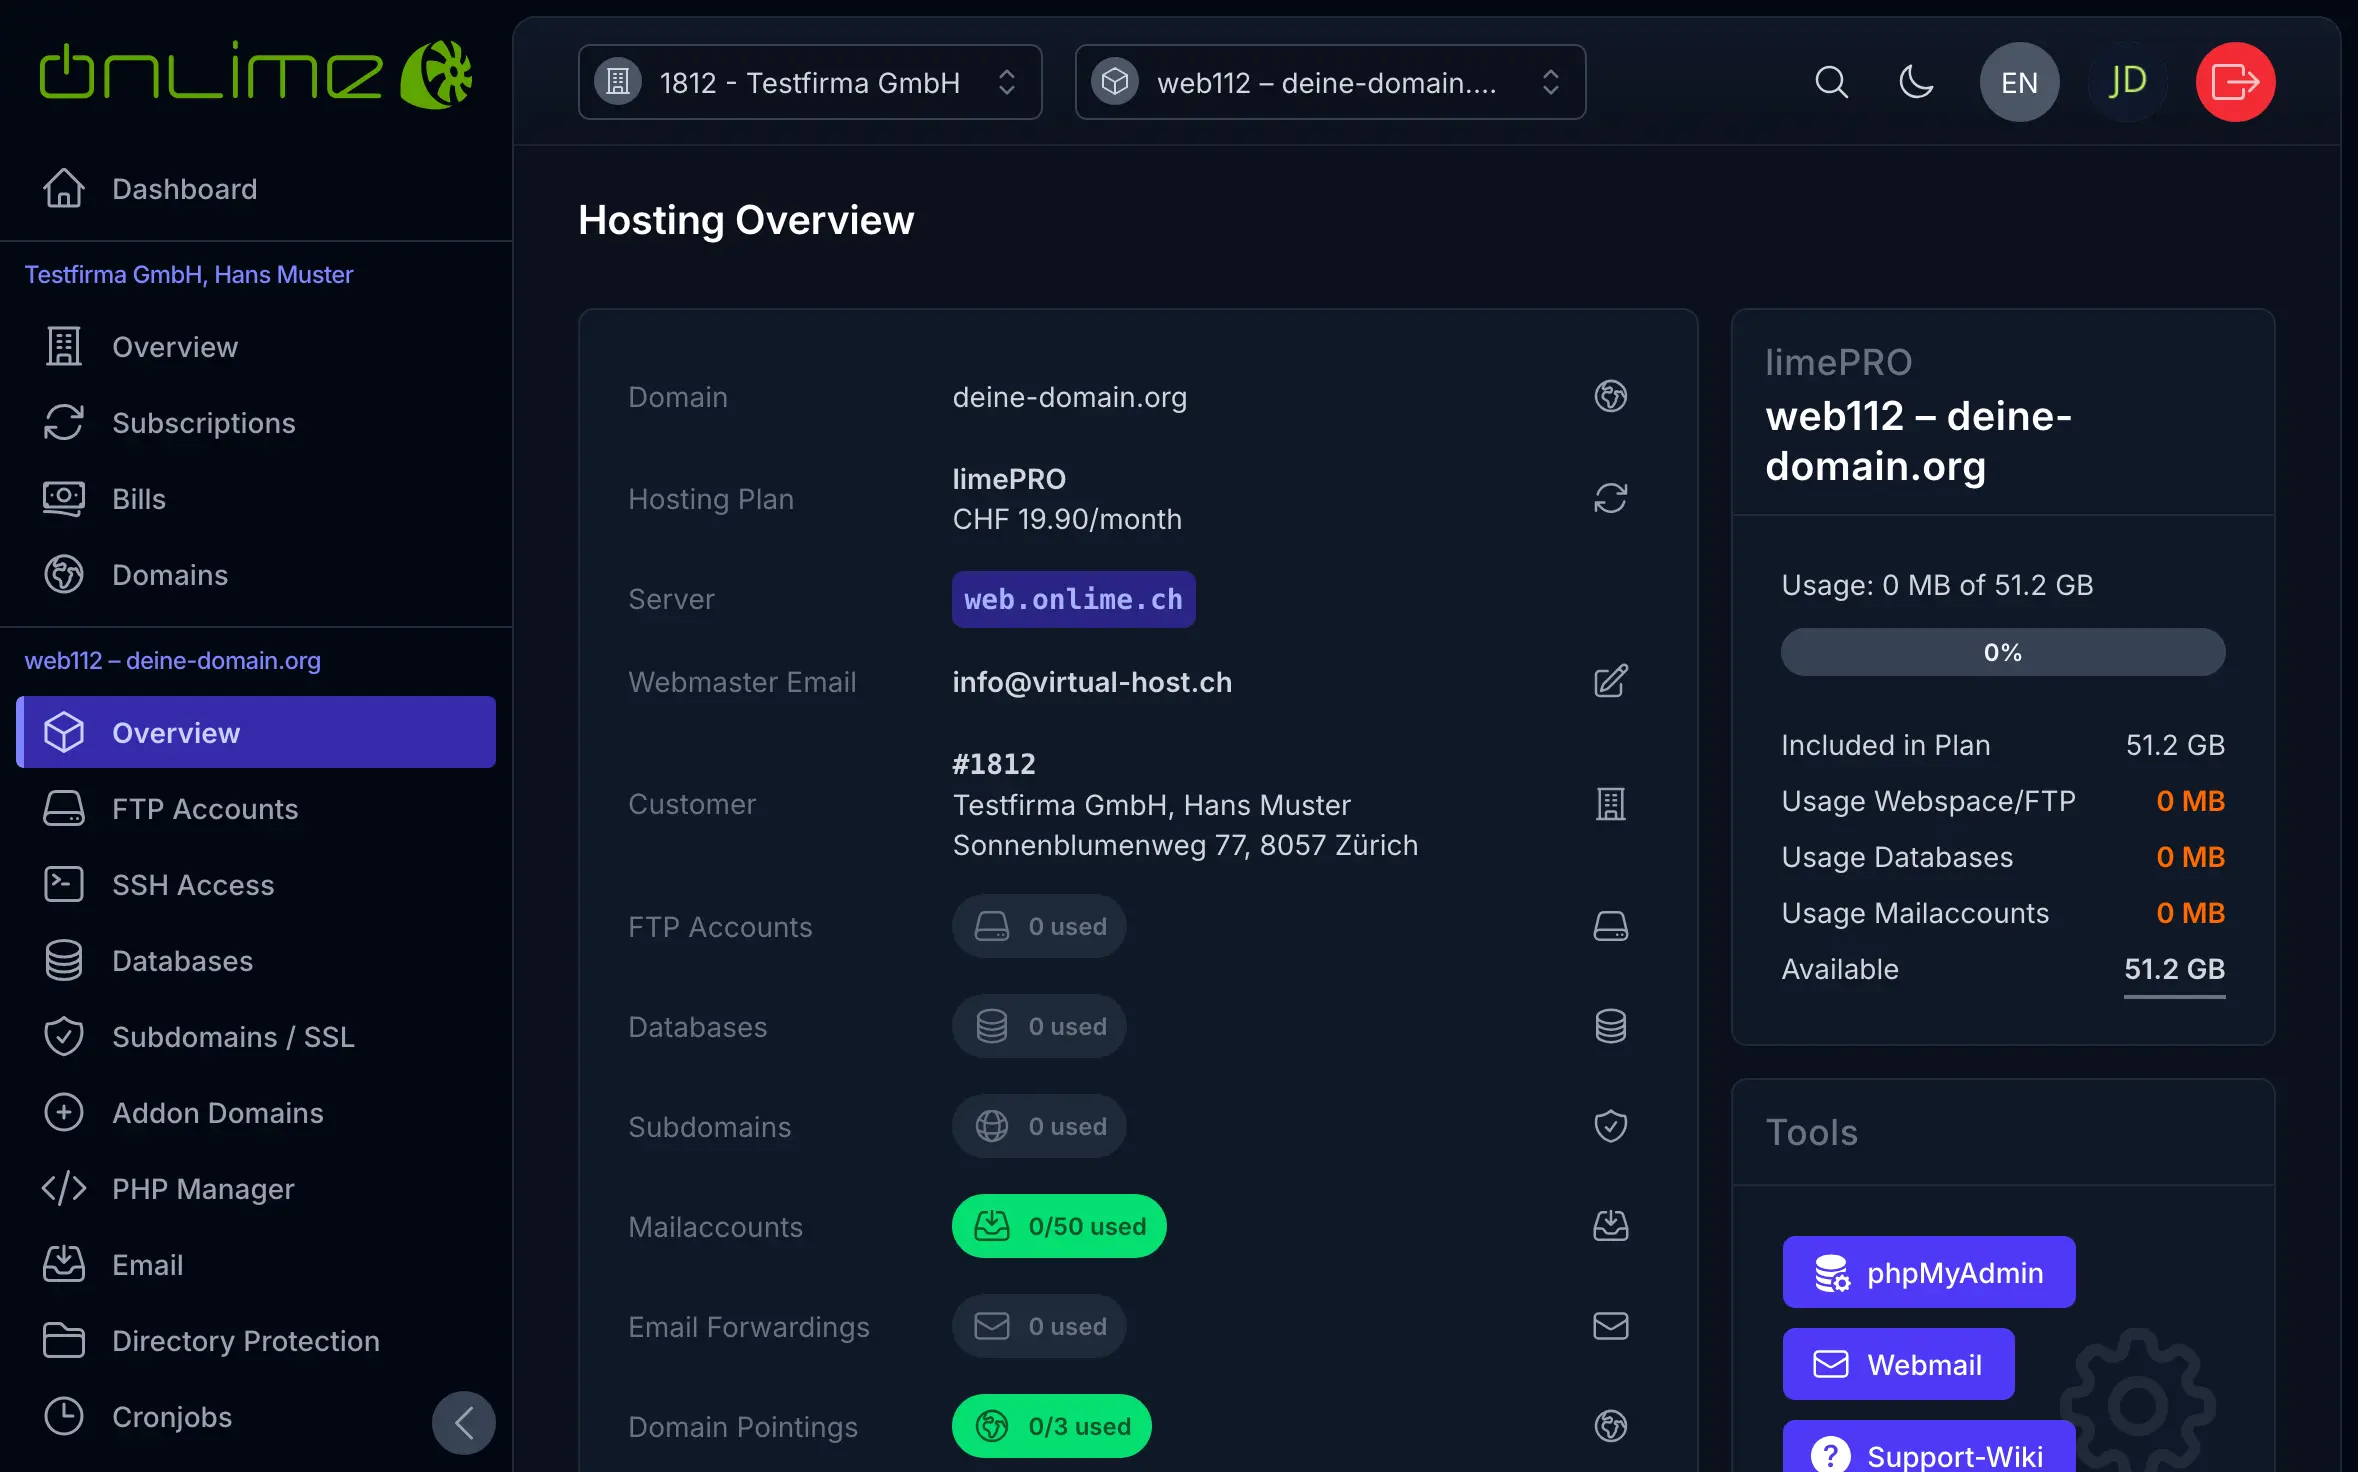
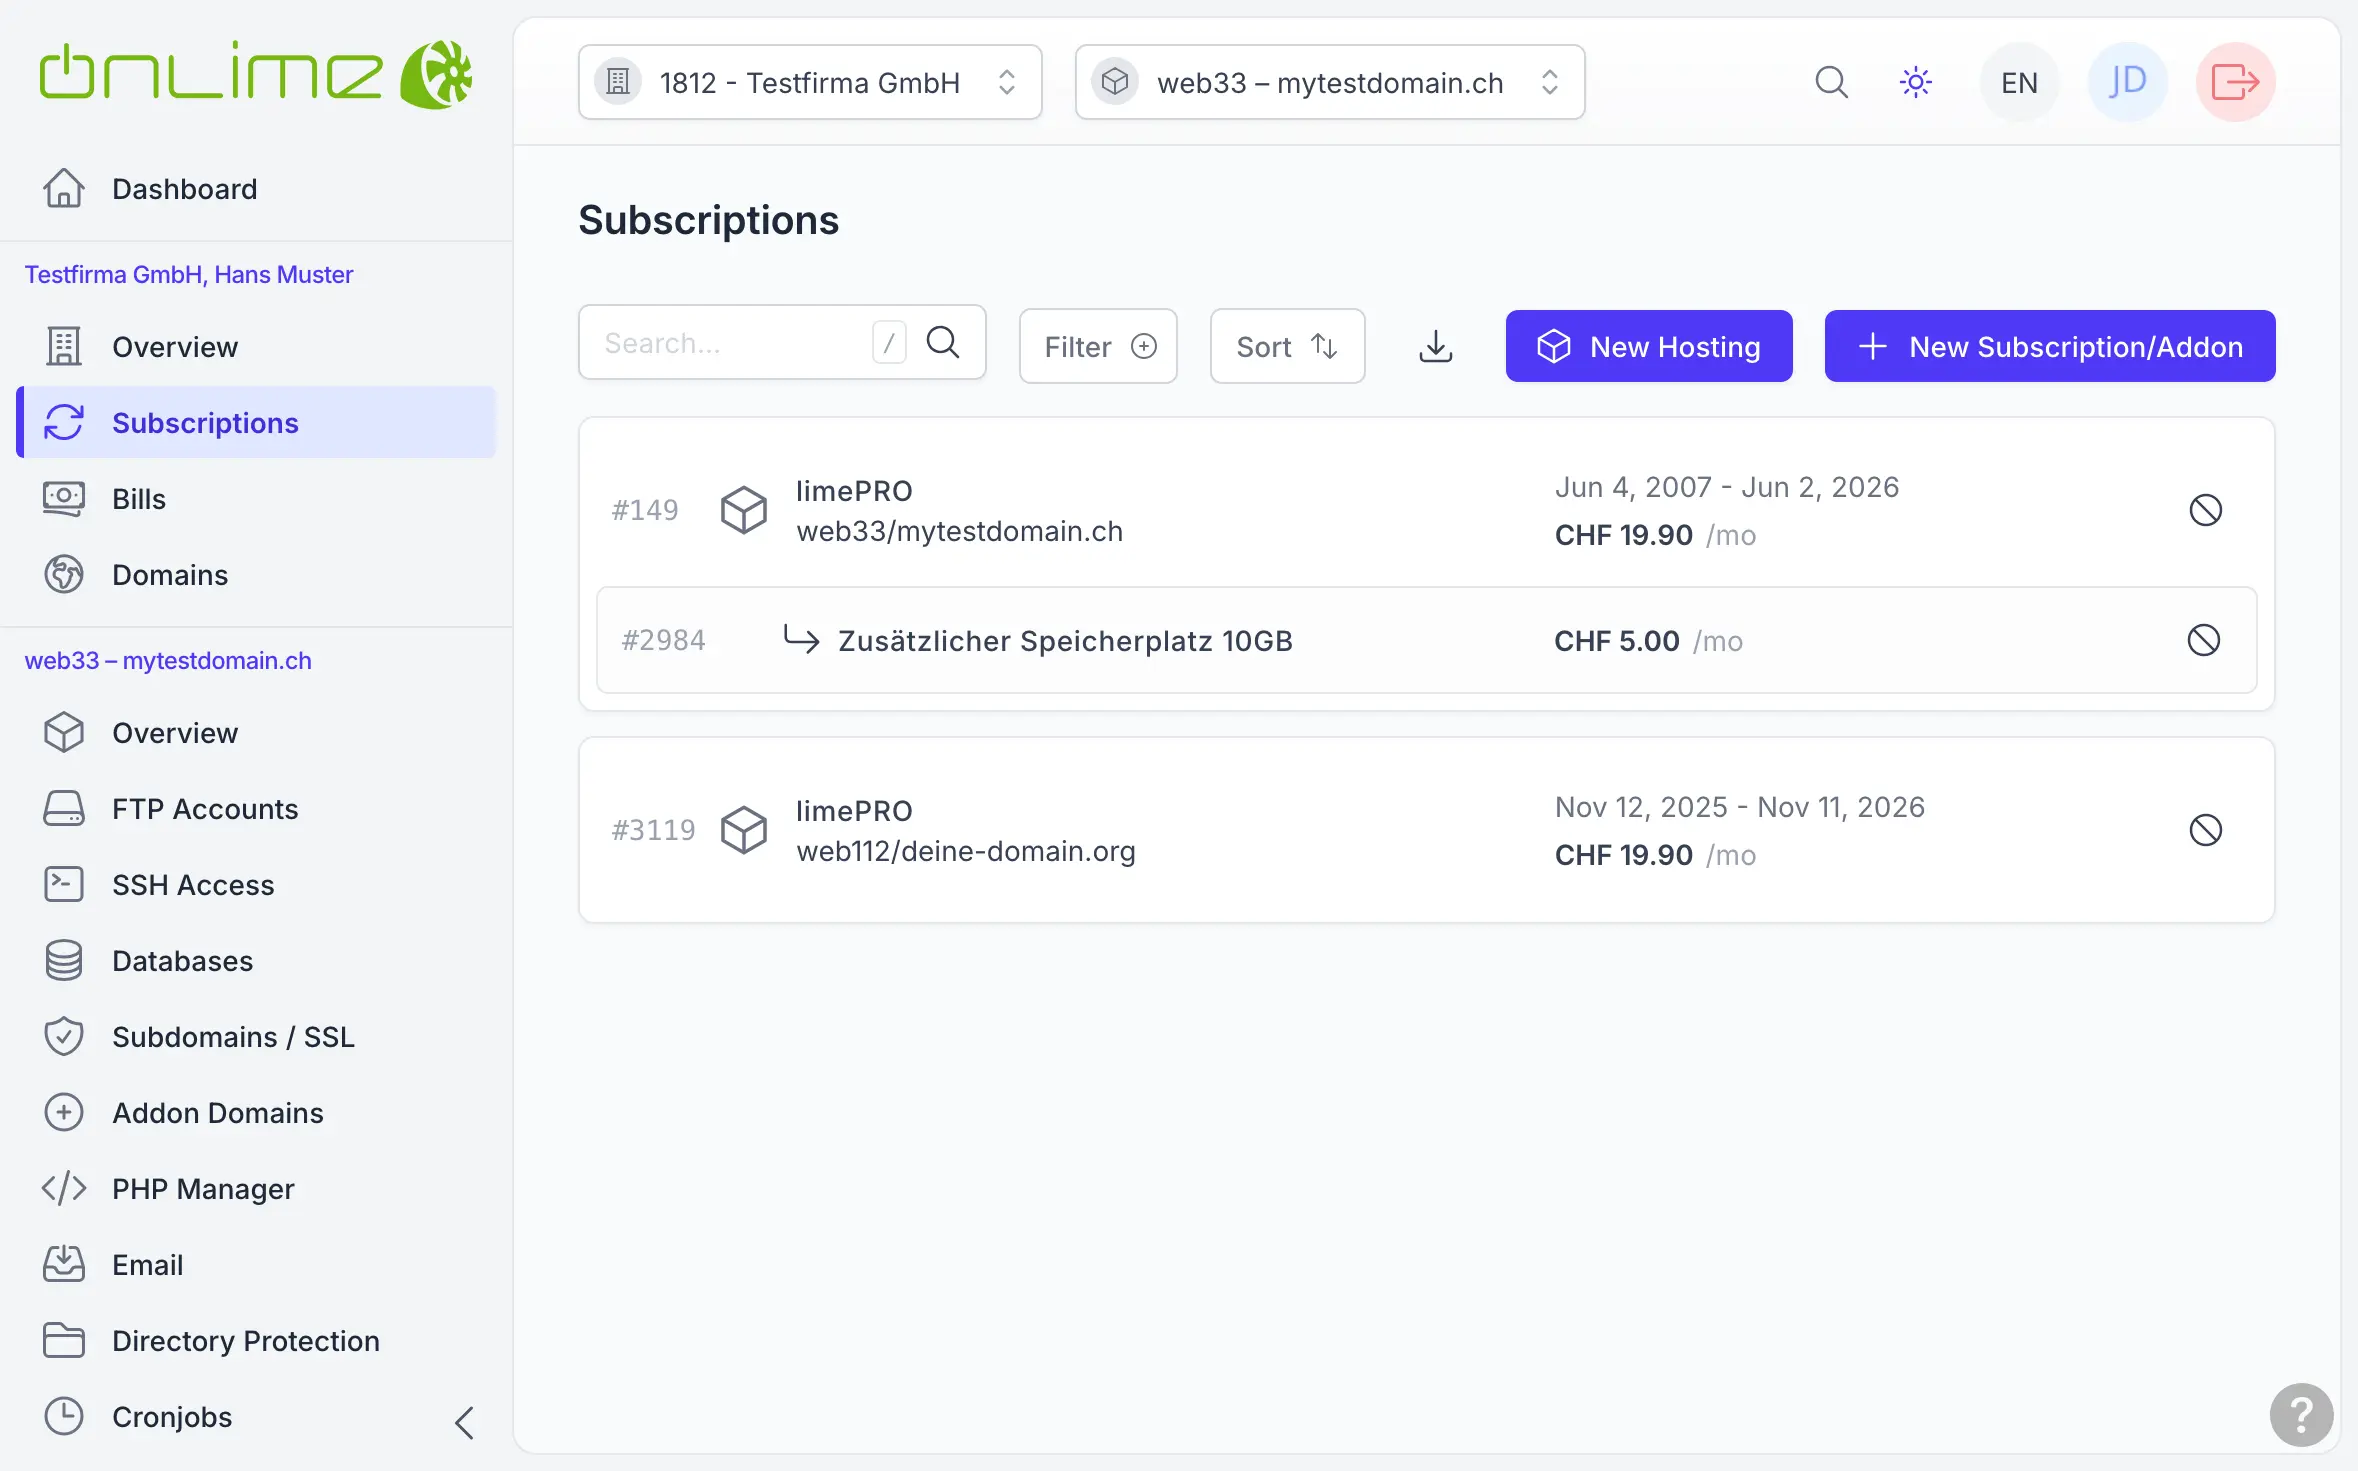
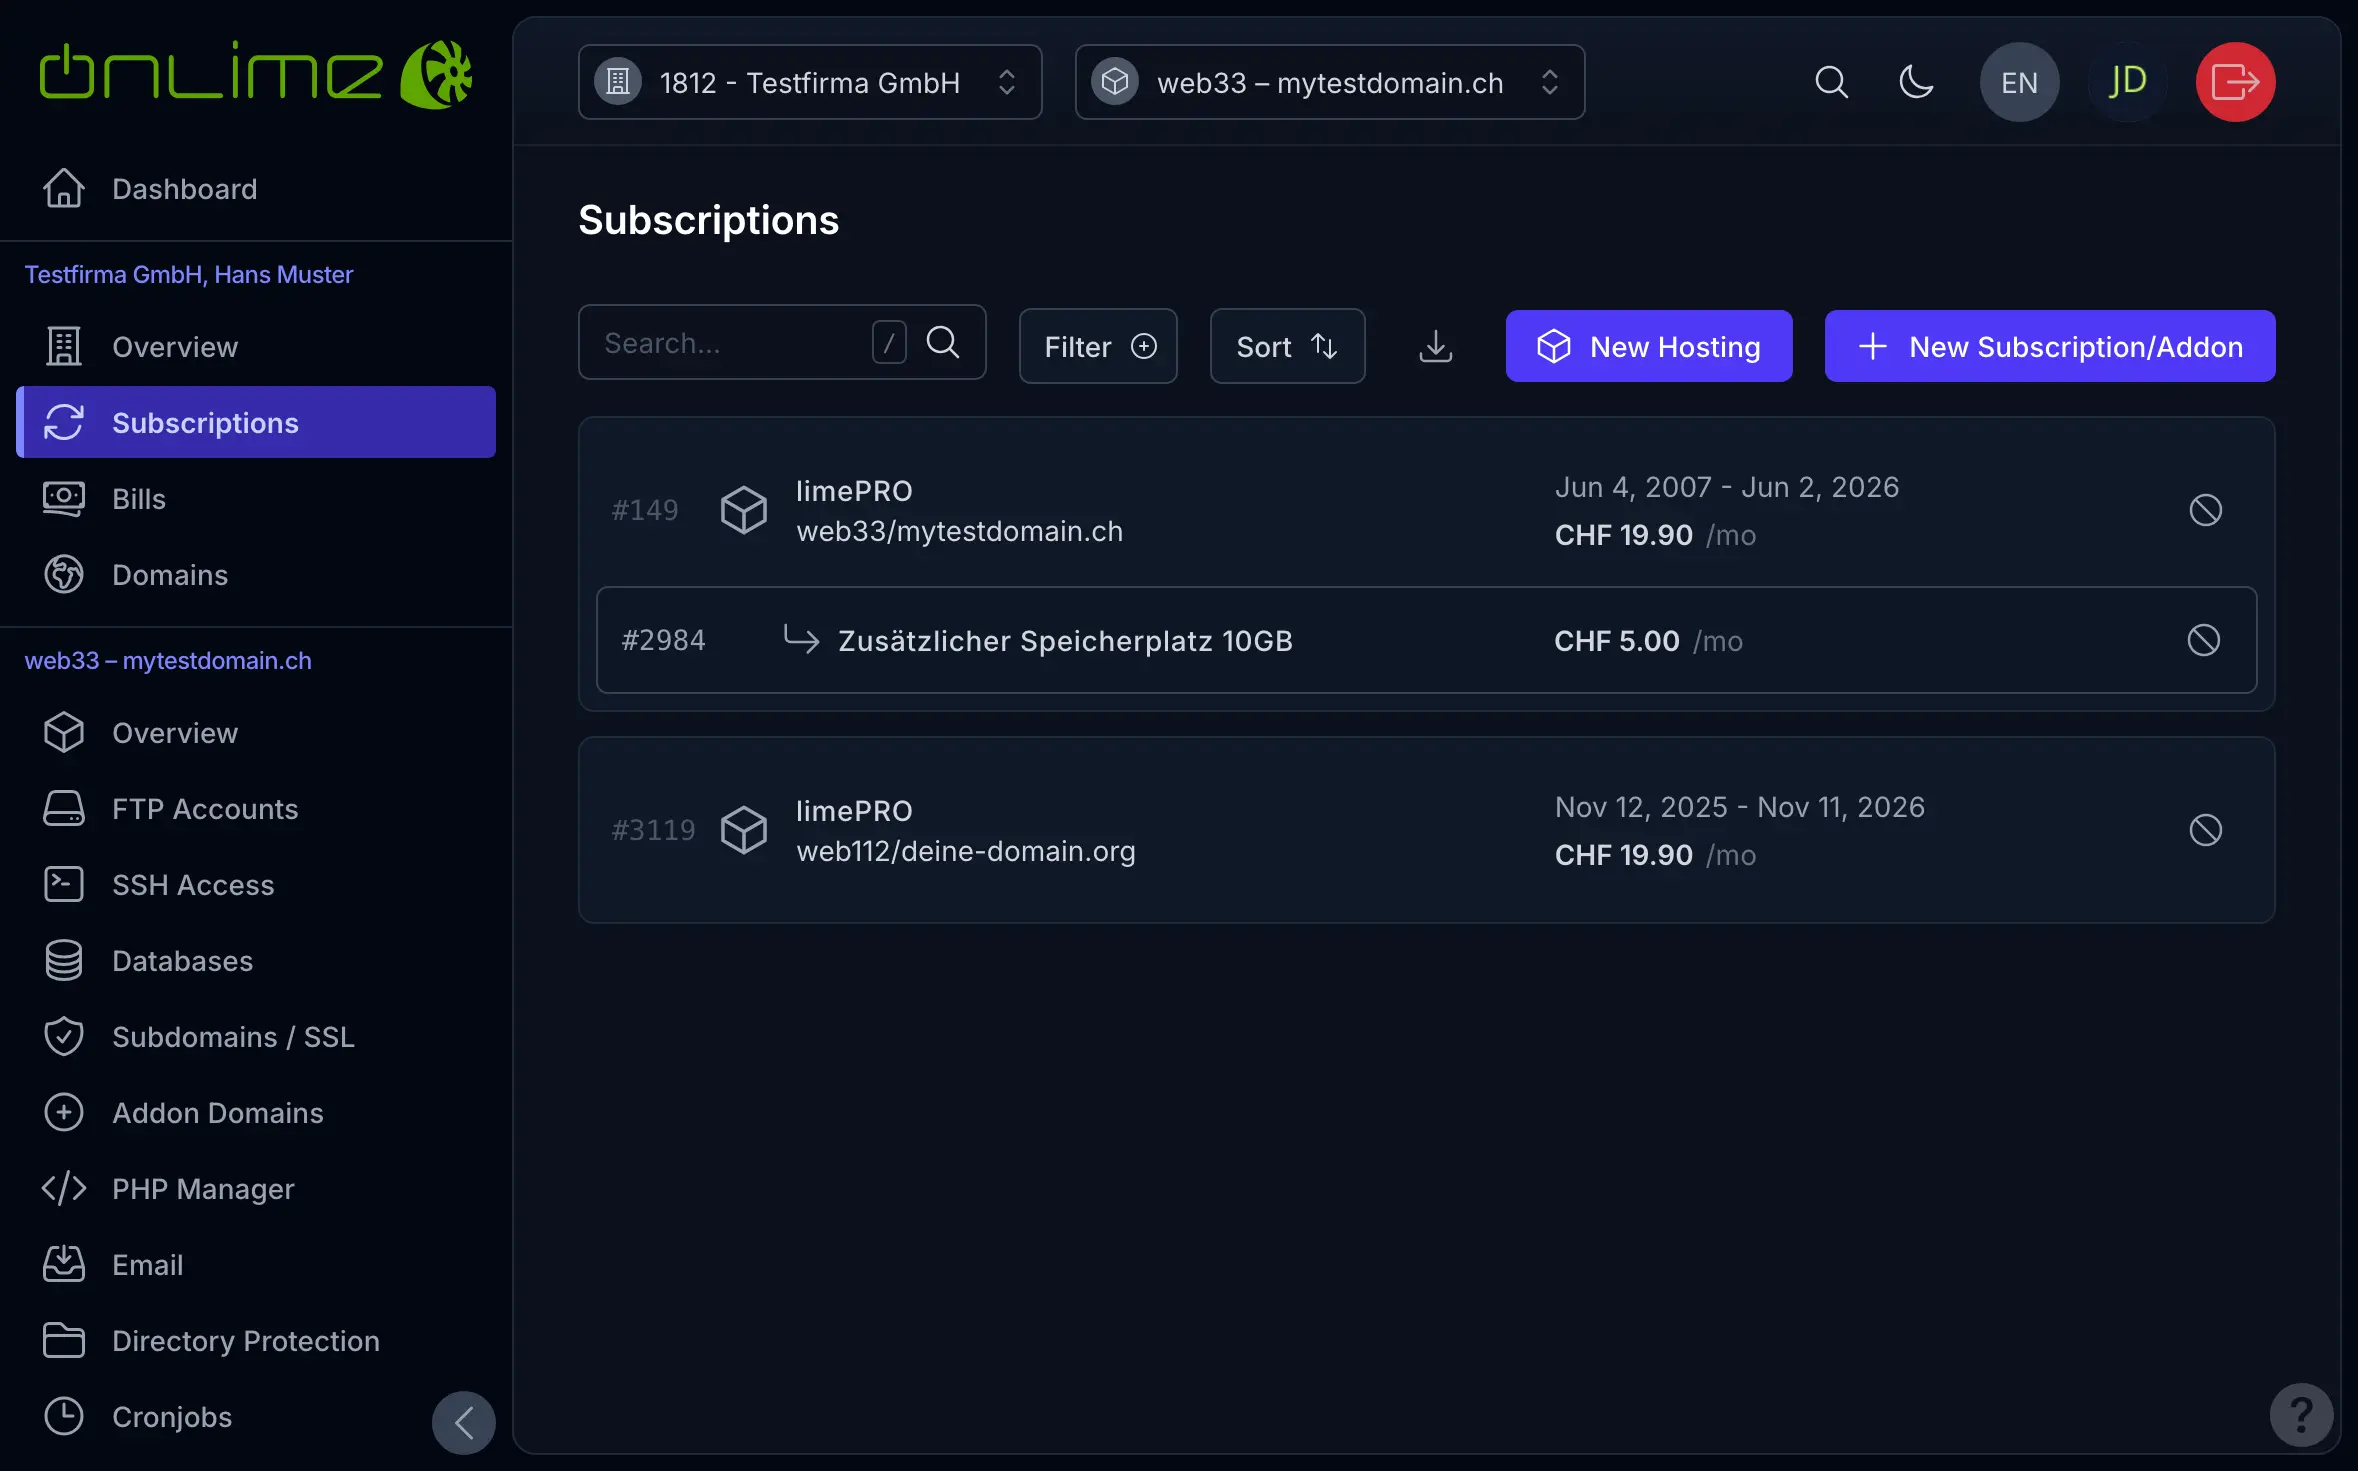
Within a few seconds, your hosting is set up and appears in the subscription overview. At the top, you can use the customer/hosting switchers to switch between different customers/hostings. The currently selected hosting is always shown in the left menu, where you'll find all settings.
This is what the «Hosting Overview» of a freshly created hosting looks like: